Monday, January 12, 2009

sunday supper: not a pretty picture


I cannot blame my poor photography skills for this one. The fact of that matter is, if you put a chicken in a slow cooker for seven hours, it is generally not going to be attractive. It will, however, be extremely tasty. This is a slow cooker version of the Filipino classic Chicken Adobo. Adobo is a simple combination of soy sauce, vinegar, crushed garlic, peppercorns, and bay leaves and is traditionally made with pork or chicken or both. Some people like to brown the meat after cooking for a nice crisp edge, but because this version cooks for so long, I don't recommend attempting it, the chicken just falls completely off the bones. That, of course, is a good thing in itself. Seven hours in it's salty, tangy bath and the chicken was completely infused with flavor, lovely and tender, and perfect comfort food on a cold Sunday. I went off to spend a lovely day knitting at Leah's house and came home to the delicious aroma of a hot dinner. I love slow cookers. Recipe after the jump:

SLOW COOKER CHICKEN ADOBO

1 3-pound chicken, cut into parts (or parts of your choice)
1 large sweet onion, sliced
1 cup plus two tablespoons of soy sauce
1 teaspoon black peppercorns
10 cloves garlic, crushed
3/4 cup white vinegar
1 cup water
2 bay leaves

Place chicken pieces in a slow cooker. In a small bowl mix the onion, garlic, soy sauce, and vinegar, and pour over the chicken. Add the peppercorns and bay leaves. Cook on Low for 6 to 7 hours. Depending on the fattiness of the chicken, you may end up with quite a bit of fat on the surface of the liquid, I prefer to skim some of it off so that it is not so greasy, but this is to your taste. Serve over steamed white rice.

Continue Reading "sunday supper: not a pretty picture"

Friday, January 09, 2009

easy weeknight dinner: sole meuniere


Screw 30-minute meals, this one takes 15 minutes tops. Sole Meuniere, that utterly classic French dish, dispells all myths that French food is complicated. "Meuniere" means miller's wife and apparently refers to the dusting of flour on the fillets. All there is to this dish is a light dredging in flour, salt, and pepper, then a quick saute in brown butter and a good spritz of lemon juice. Top with chopped parsley and a slice of lemon and it looks far fancier than it is. And of course, in my house anything with lemon is universally loved. This is one of the few fish preparations I do that J-Cat will eat tons and tons of. I served it with a hunk of nice crusty baguette and some pan-sauteed brussels sprouts, chopped for quicker cooking. Recipe after the jump:


SOLE MEUNIERE

4 fillets of sole, preferably Dover sole if you can find it (approx. 1 pound)
flour for dredging
salt and pepper, to taste
3 tbsp unsalted butter
2 tbsp olive oil
1/2 cup dry white wine
juice of half a lemon, plus lemon slices (from the other half) for garnish
3 tbsp chopped parsley

Heat 2 tablespoons of the butter with the olive oil in a large skillet or saute pan until the butter stops foaming. Mix the flour, salt and pepper in a large plate or bowl and dredge each fillet in the mixture, shaking off excess flour. Place the fillets in the pan being careful not to crowd the pan. Let the fillets to cook for about 3 minutes without touching them to allow a good browning. Flip and cook on the other side for another 2 to 3 minutes until cooked through.

Lower the heat, add the wine, lemon juice, and remaining 1 tbsp of butter. Let sizzle until the butter has melted and swirl to mix the sauce. Serve topped with chopped parsley, a slice of lemon, and with a good spoonful of sauce over top.

Continue Reading "easy weeknight dinner: sole meuniere"

Thursday, January 08, 2009

puffy pear tart


I can't even take any credit for this tart because it is ridiculous how easy it was. Lately I've been into the magic of frozen puff pastry sheets and I've been looking for excuses to use it. I still sort of feel like it's cheating, like I'm not really cooking when I use them, but I generally get over it quickly when I eat the results. For this, I just used it as the crust for a pretty classic French-style pear tart. It was pretty darn tasty, and I found that you could actually eat this with your hands like a slice of pizza, the puff pastry was quite sturdy. Recipe after the jump:


PUFFY PEAR TART

1 sheet frozen puff pastry, defrosted
2 small pears, peeled, halved, cored, and thinly sliced crosswise
1/4 cup granulated sugar (or more depending on the sweetness of the pears)
1/2 cup apricot preserves
2 tbsp pear brandy
2 tbsp cold unsalted butter, cut into small cubes

Preheat oven to 375 degrees. Unfold the puff pastry sheet and lay out on a parchment-lined baking sheet. Slice a 1/2-inch strip off of all four sides, then place the strip on top of the edge that it was sliced from to create a wall. Dock the rest of the pastry with a fork. Lay the pear slices artfully on the pastry, within the 1/2-inch wall. Sprinkle evenly with the sugar.

In a small saucepan, heat the apricot preserves and the brandy over a low heat until it loosens and becomes syrupy, stirring to combine well. If your preserves are quite chunky, it is best to strain the syrup, although I am generally too lazy to do so. Using a pastry brush, brush the entire top of the tart - including the pastry walls - with the preserves. Dot the top of the fruit with the butter cubes. Bake in the preheated oven for about 30 minutes or until the pastry is browned and the pears are softened. Serve with vanilla ice cream or whipped cream.

Continue Reading "puffy pear tart"

Wednesday, January 07, 2009

short rib showdown: beer vs. wine


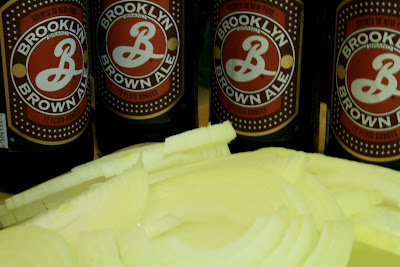
Short ribs are pretty much my favorite thing to braise when it's cold out. They are perhaps the main reason that beef will always win out as my favorite meat, despite my deep appreciation for all things porky. I have two favorite recipes for braising short ribs - one with red wine, and one with beer. I tend to prefer the red wine recipe, J-Cat prefers the beer recipe. This is pretty much the opposite of our actual drinking tastes, where I prefer beer and he prefers wine. I find that strange. In any case, I do love both recipes and since I will likely braise short ribs at least a few times this winter, this time I went for the beer braising because, well, I had beer in the fridge.

The key to this recipe is the combination of tons and tons of onions and a dark beer. The bitterness of the beer, the sweetness of the onions, and the profound beefiness of the short ribs is a truly glorious combination.


I, of course, eat this over rice, as I do with pretty much everything. You do want something to soak up the beery, oniony, beefy sauce. Obviously, mashed potatoes or bread would work just as well. Recipe after the jump:

BEEF SHORT RIBS BRAISED IN BEER
from "Staff Meals from Chanterelle" by David Waltuck and Melicia Phillips

3/4 cup canola or other vegetable oil
5 to 6 pounds beef short ribs, trimmed of fat
4 large onions, halved lengthwise and cut crosswise into thin slices
2 tablespoons sugar
2 tablespoons all-purpose flour
4 bottles (12 ounces each) dark ale or beer
8 cups chicken stock
4 bay leaves
Coarse (kosher) salt and coarsely ground black pepper, to taste

Heat 1/2 cup of the oil in a very large, heavy, flameproof casserole or Dutch oven over medium-high heat. Add only enough of the short ribs to fit into the casserole without crowding and brown well on all sides, 4 to 5 minutes per side. As the ribs are browned, transfer them to a platter and continue browning the remaining ribs in batches.

When all the ribs are browned and removed from the casserole, discard the oil from the casserole, but do not wash it (you want to keep those flavorful brown bits). Return the casserole to the stove. Add the remaining 1/4 cup oil and the onions and cook slowly, covered, over low heat until the onions are very soft but not browned, about 20 minutes.

Uncover the casserole and sprinkle the sugar over the onions. Cook, uncovered, stirring occasionally, until the onions have caramelized slightly and are just light brown in color, about 5 minutes. Sprinkle the flour over the onions and continue cooking stirring frequently, until the flour turns light brown, 3 to 4 minutes. Add 1 bottle of the beer and increase the heat to medium high. Bring to a boil, scraping the bottom of the casserole with a wooden spoon to loosen any browned bits.

Return the ribs to the casserole along with the stock, remaining beer, and bay leaves. Bring to a boil, skimming the top occasionally, then reduce the heat to low and cook, tightly covered, until the meat is very tender, 1 1/2 to 2 hours; you should be able to pull the bones from the meat with ease. Using tongs, transfer the ribs to a platter and let cool.

While the ribs cool, check the liquid in the casserole. If it's thick enough to coat the back of a spoon, it's ready to use as a sauce. If not, increase the heat to medium and reduce the liquid until it reaches the proper thickness. This may take up to an additional 15 minutes. Taste; the sauce should be slightly bitter, with a subtle, balancing touch of sweetness from the caramelized onions. Season with salt and pepper; remove and discard the bay leaves.

When the ribs are cool enough to handle, remove the meat from the bones. Discard the bones and return the meat to the casserole. Simmer until heated through, about 5 minutes. If you'll be serving immediately, skim the fat from the surface of the sauce; otherwise, refrigerate overnight and remove the hardened fat before reheating.

Continue Reading "short rib showdown: beer vs. wine"

Wednesday, December 31, 2008

foodie for life


The result of sitting around bored at work with Castro and trying to think of something fun to do. It was one stop in a day of indulgence that continued into the night and left us a good 10 pounds heavier and a whole lot poorer.

Continue Reading "foodie for life"

Tuesday, December 30, 2008

pizza!


Two of J-Cat's overly generous Christmas presents are represented in this post: the pizzas are made with my new brick walled pizza oven, and the pictures are taken with my new Canon digital SLR (but give me a break, I don't know how to use it yet). Methinks someone was feeling guilty about all the nursing I had to do last month. But it's not like he doesn't benefit at least from the pizza oven. I turned out a batch of 3 small pizzas last night, with gloriously crispy crusts and melty cheese and the aroma of an actual pizzeria.


The first pizza turned out to be our favorite by far, a sauceless combination of brussels sprouts and sweet Italian sausage with fior di latte mozzarella. Pizza perfection. See what I mean about brussels sprouts obsession?


The second was a simple classic of tomato sauce, mozzarella, and parmesan. I was pretty happy with my thrown together pizza sauce, it really showed through on this one.


The third was the same as the second with the addition of spicy Italian sausage, and was the one that felt most like a pizzeria pizza. Overall I was really pretty thrilled with the results and how easy it ended up being. The hardest part was waiting for the dough to rise, but really it was an exceedingly simple dough. Recipes for the sauce and the dough after the jump:

THE SIMPLEST PIZZA DOUGH
Makes 4 8" pizzas or 3 10" pizzas, depending on the thickness of your crust.

3 cups all-purpose flour (up to 1/3 can be replaced with whole wheat flour)
1 packet active dry yeast
2 tsp salt
1 cup lukewarm water
2 tbsp olive oil

In a large mixing bowl, combine the dry ingredients and mix well. Add the water and oil and stir just until the dough comes together. Turn the dough out onto a lightly floured surface and knead for 2 minutes until smooth. Lightly oil the mixing bowl. Shape the dough into a ball and return to the mix bowl, turning to coat all sides with a bit of oil. Cover the bowl with plastic wrap and allow to rise for 1 to 2 hours until about doubled in size.

After rising, return the dough to the floured surface and press out the air. Divide into either 3 or 4 balls, depending on what size you want your pizzas. Cover the dough with the plastic wrap and allow to rest for another 20 minutes. In the meantime, preheat your oven as hot as it will get. Shape the dough by stretching or rolling to desired thinness. Top and bake for about 10 minutes on a pizza stone or perforated pizza pan until the crust is browned and crispy. Best served immediately.


THE SIMPLEST PIZZA SAUCE

1 15-oz can plum tomatoes, pureed (I just use an immersion mixer, but this can easily be done in a food processor)
1 tsp olive oil
1 tsp tomato paste
2 tsp salt
1 tsp freshly ground pepper
2 tsp dried oregano
1 tsp garlic powder

Heat olive oil over medium heat in a medium skillet. Add the tomato paste and allow to sizzle for a minute or two. Add the tomato puree and the seasonings. Bring to a strong simmer then lower to a light simmer until it reduces by about a half, approximately 20 minutes.

Continue Reading "pizza!"

Monday, December 29, 2008

i'm terribly late...


...in wishing everyone a Merry Christmas and a Happy Chanukah. So instead, Happy New Year and Season's Eatings!

Continue Reading "i'm terribly late..."

veggie obsession: brussels sprouts pasta


The only vegetable that I eat more often than cauliflower is probably brussels sprouts. This is partly because they are literally the easiest vegetable to make. They require barely any prep, will cook in a myriad of simple ways, are best with little adornment, and make you feel like a giant. I also recently read that brussels sprouts are the "it" vegetable right now, I guess in the restaurant world they're what fennel was last year. As proof, I had an amazing crostini at 'inoteca last week featuring shaved brussels sprouts, lemon oil, and I think a bit of pecorino cheese. A couple of days later I had a pizza with brussels sprouts and speck at Motorino. Both were freaking fantastic.


This recipe for Pasta with Brussels Sprouts and Pine Nuts takes the diminutive wild cabbage one step further into the spotlight for a main dish, offset with toasted pine nuts and served with simply seared diver scallops. Recipes after the jump:

FETTUCCINE WITH ROASTED BRUSSELS SPROUTS AND PINE NUTS
1 pound fettuccine, preferably fresh
2 tbsp butter
2 tbsp olive oil
2 pints brussels sprouts, trimmed and halved lengthwise
3 tbsp toasted pine nuts
salt and pepper, to taste

Preheat the oven to 400 degrees. Toss the brussels sprouts with 2 tsp olive oil and generously salt and pepper. Place in a baking pan and roast in the oven for 15-20 minutes, until tender and lightly charred. You can toast the pine nuts during the last 5 minutes but watch them carefully as they should not be over browned.

In the meantime, bring 4 quarts of salted water to boil for the pasta. When pasta is ready, drain and add to a large mixing bowl with the remaining olive oil, the butter, the brussels sprouts and the pine nuts. Toss to coat well, and taste for salt and pepper. Serve with grated parmesan.


SEARED DIVER SCALLOPS
The best scallops for searing are "dry" scallops. The "wet" scallops are treated for moisture and will never develop a good brown sear. Despite being dry, you should still pat your scallops dry with a paper towel before cooking to insure the best sear.

4-6 large dry scallops
1 tbsp unsalted butter or ghee
1 tbsp vegetable oil
salt and pepper

Heat the oil and butter in a nonstick skillet over high heat until the butter foam subsides. Pat the scallops dry with a paper towel, then season generously with salt and pepper. Place the scallops in the hot pan, being careful not to overcrowd them. If the scallops are too close together, they will steam instead of sear. Do not touch the scallops for at least 2 minutes to insure a good brown crust. When they are nicely browned, flip the scallops and continue to cook for another minute or two. The scallops should still be a bit springy and not too firm. The second side will not brown as nicely as the first, just serve that side down. Remove the scallops from the pan and serve immediately.

Continue Reading "veggie obsession: brussels sprouts pasta"

Tuesday, December 23, 2008

bread gifts


I know this doesn't look that appetizing, but hear me out. The other day my colleague Bill was walking around with a big loaf of bread and he didn't apparently want this gift loaf so of course I'm the obvious person who will take it off his hands. Then I had some intense lapse of mental capacity and forgot about it. How I managed to forget about a nice loaf of bread is beyond me, but by the time I remembered it was hard as a rock. Luckily, the voice of Bosslady Beth singing out "bread pudding!" resounded in my ears and I knew exactly what to do.


I would abandon my plan to make a simple pear tart and instead make a pear bread pudding, dosed with some Pear William Brandy. A little searching found not only a pear bread pudding recipe, but a supposedly healthy Caramelized Pear Bread Pudding. Now, in all seriousness, no bread pudding is going to be healthy, but I guess the use of low-fat milk instead of heavy cream and the moderate amount of sugar makes this somewhat less indulgent. Luckily, it still tasted indulgent, and the mild sweetness of the pears was the perfect balance to the dense custardy bread. I worked the pear brandy in by soaking the golden raisins in it for a while and dumping the whole lot into the mix before baking. A custardy rich bread pudding that you don't have to feel terrible about.

By the way, in other bread gift news, Bosslady Beth just gave me a gift card to Amy's Bread. Yes, that is how much I love carbs. Recipe after the jump:

CARAMELIZED PEAR BREAD PUDDING
Adapted from Eating Well.com

2 1/2 cups low-fat milk
4 large eggs
1/2 cup sugar, divided
1 teaspoon vanilla extract
1/2 teaspoon freshly grated lemon zest
1/8 teaspoon freshly grated nutmeg
1/4 teaspoon ground cinnamon
1/4 teaspoon ground allspice
4 cups cubed, day-old country-style bread, crusts trimmed (4-6 slices), preferably whole-wheat
2 tablespoons golden raisins
3 tablespoons pear brandy (optional)
1 teaspoon unsalted butter, softened, plus 2 tablespoons, divided
2 ripe bosc pears, peeled, halved and cored
1 tablespoon lemon juice

1. Soak the raisins in the pear brandy while you prepare the rest of the ingredients. Heat milk in a medium saucepan over medium-low heat, stirring, until steaming, 4 to 6 minutes. Whisk eggs in a large bowl until blended; gradually whisk in 1/4 cup sugar. Slowly whisk in the hot milk until blended. Whisk in vanilla, lemon zest and nutmeg.
2. Add bread and raisins with the brandy to the milk mixture; gently fold together. Press down lightly with the back of a large spoon. Cover and set aside at room temperature.
3. Butter the bottom and sides of a round 2-quart baking dish with 1 teaspoon butter. Preheat oven to 350°F. Put a kettle of water on to boil.
4. Cut each pear half lengthwise into 4 slices. Place in a medium bowl and toss with lemon juice.
5. Heat a medium skillet over low heat until hot. Add the remaining 2 tablespoons butter and swirl until just melted and the foam subsides. Sprinkle the remaining 1/4 cup sugar over the melted butter. Arrange the pear slices on their sides in the pan in an even layer. Increase the heat to medium-low and, without stirring, let the pears begin to brown and the sauce slowly caramelize, adjusting the heat as needed to prevent burning, about 10 minutes. Remove the pan from the heat and carefully turn each pear slice with a fork. Return to the heat and cook until the sauce is uniformly golden, 2 to 4 minutes more.
6. Carefully transfer the pears one at a time to the prepared baking dish, arranging them decoratively in a circle and slightly overlapping them if necessary. Use a heatproof silicone spatula to scrape any remaining syrup over the pears.
7. Set the baking dish in a shallow baking pan. Spoon the bread and custard mixture into the baking dish. Press down on the bread until it is submerged in the custard. Place the pan in the oven and carefully add the hot water to the shallow baking pan until it is halfway up the sides of the baking dish.
8. Bake until the pudding is browned on top and set in the center, 1 to 1 1/4 hours. Carefully remove the pan from the oven. Transfer the baking dish to a wire rack and let cool for at least 45 minutes. To serve, run a knife around the edge of the pudding. Place a serving platter over it and invert the pudding onto the platter.

Continue Reading "bread gifts"

Monday, December 22, 2008

sunday supper: oven-baked "BBQ" brisket


I never used to believe in liquid smoke. It sounds like some kind of snake oil that only rubes fall for. How could it possibly work? Is a faux-BBQ even worth attempting? Well, I found out the answer yesterday, when I tried Homesick Texan's recipe for Oven-Baked Brisket. I figured, if a Texan found the result acceptable, it couldn't be THAT bad. And I must say, it was THAT good. Now, of course, the whole apt smells of hickory smoke, which certainly is not a bad thing. And I have a hunk of delicious brisket to make sandwiches and - dare I say it - brisket fried rice. And Morty thought it was freaking delicious, too. Recipe after the jump:


OVEN-BAKED BRISKET
From Homesick Texan

Ingredients:
1 four-pound untrimmed brisket
2 tablespoons of salt
2 tablespoons of black pepper
2 teaspoons cayenne
4 cloves of garlic, crushed
1 onion cut into slivers
1/4 cup soy sauce
1/8 cup Worcestershire sauce
1/4 cup liquid smoke plus an additional 1/4 cup.
1/4 cup black coffee
1/4 cup apple cider vinegar
3 fresh jalapenos, sliced

Method:
1. Preheat your oven to 250 degrees.
2. Mix together the salt, black pepper, cayenne and crushed garlic, and rub all over your brisket (more heavily on the meatier side but also a bit on the fat side as well). Allow the brisket to come to room temperature.
3. In a large roasting pan, add the slivered onions, soy sauce, Worcestershire sauce, 1/4 cup of the liquid smoke, 1/4 cup black coffee, 1/4 cup apple cider vinegar and half the sliced jalapenos.
4. Place the brisket in the pan, fat side up, and sprinkle the remaining jalapenos on top of the brisket.
5. Cover the pan tightly with foil, and bake in the oven for four hours. At this point, if you want a more pronounced smoky taste, pour another 1/4 cup of the liquid smoke over the brisket. Otherwise, just continue cooking for another hour, or roughly 1 hour and 15 minutes per pound.
6. Take the brisket out of the oven, and it should be tender to the touch. Let it sit out of the pan for half an hour, and then trim the fat on top and slice against the grain. If you desire a gravy, they pan juice is a fine, fine topping.

Continue Reading "sunday supper: oven-baked "BBQ" brisket"

Friday, December 19, 2008

this is not a post about snow


It's about the easiest side dish ever: garlicky broccoli rabe. It's simply broccoli rabe, lots of garlic, hot red pepper flakes, and olive oil. Yes, it's snowing out, but there's no reason to not eat some fresh springy greens. Recipe after the jump:


GARLICKY BROCCOLI RABE
1 bunch broccoli rabe, chopped into 1-inch lengths
4 cloves garlic, thinly sliced
large pinch hot red pepper flakes, to taste
2 tbsp olive oil
salt and pepper, to taste

Heat oil with the garlic in a large saute pan over medium high heat. When the garlic starts to get fragrant but before it start browning, add the hot pepper and let it sizzle in the oil for a minute. Add the broccoli rabe and saute for a few minutes. Bring down the heat and cover for a few minutes until the broccoli is bright green and tender. Continue to saute to avoid burning.

Continue Reading "this is not a post about snow"

Tuesday, December 16, 2008

easy weeknight dinner: lemon chicken with artichokes


This one literally takes 20 minutes, it's fantastically tasty, and it's quite healthy. I think that's all that needs to be said about it. Recipe after the jump:


SAUTEED LEMON CHICKEN WITH ARTICHOKES

2 tablespoons olive oil
1/2 medium yellow onion, finely chopped
3 medium garlic cloves, thinly sliced
1 1/2 pounds boneless skinless chicken meat (I prefer thighs for flavor, but anything will do) large dice
1 1/2 cups quartered artichoke hearts (canned or jarred – not frozen)
2/3 cup dry white wine
1/3 cup water
1 tablespoon freshly squeezed lemon juice, or more to taste (I used half a lemon)
1/2 cup lightly packed basil leaves, chiffonaded
1 teaspoon lemon zest

1. Heat oil in a large frying pan over medium-high heat. When it shimmers, add onion and garlic, season with salt and freshly ground black pepper, and cook until softened, about 2 minutes.
2. Add chicken and cook, stirring rarely, until well browned on all sides, about 5 minutes. Add artichoke hearts and cook until slightly broken down, about 3 minutes.
3. Add wine, water, and juice and scrape the bottom of the pan to incorporate any browned bits. Cook until alcohol smell is cooked off and sauce is slightly reduced, about 5 minutes. Remove from heat, stir in basil and lemon, and serve over rice or pasta.

Continue Reading "easy weeknight dinner: lemon chicken with artichokes"

Thursday, December 11, 2008

sunday supper: bolognese of my dreams


Marcella Hazan's magical bolognese. As far as I'm concerned, there is no reason to go looking for another recipe. This is exactly what you want bolognese to taste like, smell like, look like, sound like. This is the sauce you turn to when you're simply craving pasta in it's classic and true form. And the only thing difficult about this recipe is having the patience to cook it as long as you should - no shortcuts allowed. If I had one complaint - one teeny, tiny, probably sacrilegious complaint - it's maybe that this can be quite greasy. I know fat is a good thing and I use the fattier chuck meat, but I couldn't stop myself from skimming off a little bit of the fat as it cooked. I don't know, I have a problem. Recipe after the jump:


MARCELLA HAZAN'S PERFECT BOLOGNESE
From Essentials of Classic Italian Cooking

NOTE: I took a few liberties with ingredient amounts, which I've noted below. Still awesome.
1 Tbs vegetable oil
3 Tbs butter plus 1 Tbs for tossing the pasta
1/2 cup chopped onion
2/3 cup chopped celery
2/3 cup chopped carrot
3/4 pound ground beef chuck (I used a whole pound)
Salt
Black pepper, fresh from the mill
1 cup whole milk
Whole nutmeg
1 cup dry white wine
1 1/2 cups canned imported Italian plum tomatoes, cut up, with their juice (I used a whole 28 oz can)
1 1/4 to 1 1/2 pounds pasta (I used 1 pound of dried rigatoni)
Freshly grated parmigiano-reggiano cheese

Put the oil, butter, and chopped onion in the pot and turn the heat to medium. Cook until the onion's translucent, then add the celery and carrot and cook for 2 minutes more until coated well.

Add the ground beef, a large pinch of salt, and a few grindings of pepper; crumble the meat with a fork and stir until the beef has lost its raw, red color.

Now the cool part: add the milk and let it simmer gently, stirring frequently, until it has bubbled away completely. Add a tiny grating--about 1/8 teaspoon--of nutmeg and stir.

Add the wine, let it simmer until it's evaporated, then add the tomatoes and stir thoroughly to coat all the ingredients.

When the tomatoes begin to bubble, turn the heat down so the sauce cooks at the laziest of simmers (just an intermittent bubble here and there). Cook, uncovered, for 3 hours or more, stirring from time to time. While the sauce is cooking, you are likely to find that it begins to dry out and the fat separates from the meat. To keep it from sticking, continue the cooking, adding 1/2 cup of water whenever necessary. At the end, however, no water at all must be left and the fat must separate from the sauce. Taste and correct for salt.

Cook pasta, drain, then add the pasta to the sauce with the remaining tablespoon of butter. Toss to coat evenly and serve with grated parmiggiano-reggiano.

Continue Reading "sunday supper: bolognese of my dreams"

Wednesday, December 10, 2008

the elusive real enchilada sauce


It is very frustrating when searching around for authentic recipes to continually come across ones that appear to take a shortcut. I was determined to make chicken enchiladas one night, but quite a bit of searching kept turning up recipes that called for "enchilada sauce". But WHAT is this mysterious sauce? Why can't I figure out a way to make it from scratch? Do I really have to go back to the market and find this stuff? It just feels like cheating.


Searching for enchilada sauce recipes also turned up a mish-mash of recipes, some even calling for jarred salsa, which, really? Come on. So whatever, I have to go find myself a real Mexican cookbook to figure this out, but in the meantime I cobbled some things together and made something that mostly resembled chicken enchiladas. They were actually very good, but I wouldn't call them authentic. And that just kills me, to be honest. Recipe after the jump:


SORT OF REAL CHICKEN ENCHILADAS

For the enchiladas:
1/3 cup plus 1 tablespoon vegetable oil
12 6-inch corn tortillas
1 medium onion, chopped
2 small jalapeno peppers, seeded and chopped
1/2 teaspoon dried oregano
3 cups enchilada sauce, recipe to follow
3 cups (about) shredded cooked chicken (use leftovers, or simply poach a couple of chicken breasts in broth or water)
3 cups packed grated Monterey Jack cheese (about 12 ounces)
Sour cream or Mexican crema, to garnish
Cotija cheese, to garnish

Heat 1/3 cup vegetable oil in heavy small skillet over medium-high heat. Using tongs, add 1 tortilla and cook until softened, turning once, about 15 seconds for each side. Transfer tortilla to paper towels and drain well. Repeat with remaining tortillas.

Heat remaining 1 tablespoon vegetable oil in heavy large skillet. Add onion, pepper, and oregano and saute until onion and pepper are tender, about 5 minutes. Season to taste with salt and pepper.

Lightly oil 13x9x2-inch glass or ceramic baking dish. Spoon 1/2 cup enchilada sauce into dish. Place scant 1/4 cup chicken in center of 1 tortilla. Sprinkle with 1 generous tablespoon onion mixture. Set aside 1/2 cup cheese for topping. Spoon 2 generous tablespoons cheese atop chicken. Roll up tortilla and place seam side down in prepared dish. Repeat with remaining tortillas, chicken, onion mixture and cheese. Pour remaining sauce over enchiladas. Sprinkle with reserved 1/2 cup cheese. Cover with foil. (Can be made 1 day ahead. Chill.)

Preheat oven to 350F. Bake enchiladas, covered, until sauce bubbles and cheese melts, about 35 minutes. Remove foil and bake another 5 minutes to lightly brown the top. Serve hot with sour cream and a sprinkling of cotija cheese.

For the sauce:
3 tbsp chili powder
3 tbsp flour
1 tsp cocoa powder
1/2 tsp garlic salt
1 tsp oregano
3 cups chicken broth
1 (8 ounce) can tomato sauce

Combine all dry ingredients in a bowl. Stirring constantly, slowly add enough of the broth to make a thin paste. Pour into pan and add rest of broth. Cook over medium heat, stirring constantly, until mixture thickens. Stir in tomato sauce.

Continue Reading "the elusive real enchilada sauce"

Wednesday, December 03, 2008

the upside of a thanksgiving chicken


Matzo ball soup, made from scratch. The carcass of our Thanksgiving chicken made a delicious soup that I believe has bone-healing properties. At least for my poor Jewish boy. He took one look at the soup and said "It looks just like my mom's!". I guess that's about as good a compliment as I could ask for from him. Recipe after the jump:

HOMEMADE CHICKEN MATZO BALL SOUP

For the stock:
1 chicken carcass
4 quarts water, or enough to completely cover the carcass
1 onion, halved
2 carrots, halved
2 ribs celery, halved
various fresh herbs, tied in a bouquet garni (I used thyme, sage, and rosemary. Use whatever you have on hand.)
salt and pepper, to taste

For the matzo balls:
1 cup matzo meal
3 eggs
2 tbsp oil
2 tbsp seltzer, optional
salt and pepper

For the soup:
1 recipe chicken stock
2 carrots, cut into coins
1 onion, diced
3 tablespoons fresh dill
1 recipe matzo balls

To make the stock: In a large stockpot, cover the chicken carcass with water. Add the onion, carrots, celery, and bouquet garni. Bring to a boil, then lower to a rolling simmer. Simmer for at least 3 hours. Season with salt and pepper to taste. Remove the carcass and set aside to cool. Remove the aromatics and discard. Strain if desired.

For the soup: after straining the stock, pick the chicken meat off of the carcass and add back to the stock with the carrots, onion and dill. Bring to a boil and add the matzo balls.

For the matzo balls: Beat the eggs and oil together, then add the matzo meal, salt, pepper, and seltzer and stir just until it comes together. Shape into small balls about 1-inch in diameter and drop into the boiling stock. Cook for 30 minutes. Season with salt and pepper to taste.

Continue Reading "the upside of a thanksgiving chicken"

Tuesday, December 02, 2008

nutmeg-maple cream(?) pie


Oh this pie. Normally I wouldn't try a brand new pie recipe on a holiday like Thanksgiving, but just reading this recipe made my mouth water and I knew it had to be good. What I found odd about it, though, was that it was called a cream pie when clearly it was a custard pie. Sure there's quite a bit of cream in it, but it's the egg content that really informs the texture. This pie was like an especially good version of those eggy custard tarts at Chinese bakeries that I grew up eating. And the key to it's awesomeness was this:


Fresh nutmeg. It has to be fresh for this. The dimensions of spiciness and warmth that you just don't get in the pre-ground nutmeg is what made this pie sing.


It wasn't the most beautiful pie, due mostly to my impatient decision to pour the filling into the crust while it was still rife with bubbles from whisking. The color is perhaps a little lackluster. But no one is going to care what this pie looks like, they're just going to want to eat it. Recipe after the jump:


NUTMEG-MAPLE CREAM PIE
From The New York Times, November 15, 2006

¾ cup maple syrup
2¼ cups heavy cream
4 egg yolks
1 whole egg
¼ teaspoon salt
1 teaspoon freshly grated nutmeg
1 teaspoon vanilla extract
1 pre-baked 9-inch pie crust (see recipe).

1. Preheat oven to 300 degrees. In a medium saucepan over medium-high heat, reduce maple syrup by a quarter, 5 to 7 minutes. Stir in cream and bring to a simmer. Remove from heat.

2. In a medium bowl, whisk together egg yolks and egg. Whisking constantly, slowly add cream mixture to eggs. Strain mixture through a fine-mesh sieve into a cup or bowl with pouring spout. Stir in salt, nutmeg and vanilla.

3. Pour filling into crust and transfer to a rimmed baking sheet. Bake until pie is firm to touch but jiggles slightly when moved, about 1 hour. Let cool to room temperature before serving.

Yield: One 9-inch pie, 8 servings.

Continue Reading "nutmeg-maple cream(?) pie"

Monday, December 01, 2008

respect the cranberry


The cranberry, that tart symbol of holiday cheer and over the top gluttony. I love cranberries because they provide perfect balance when combined with both sweet and savory foods. From one bag of fresh cranberries I got two holiday dishes - a lovely classic cranberry sauce, and a sweet cakey cranberry cornbread. Ironically, in the end I discovered that spreading the sauce on the cornbread was the best possible use of both dishes.


Both of these dishes were afterthoughts. I woke up on Thanksgiving morning with my now-familiar sleep deprivation hangover and wondered if I would have the energy to put together the meal I had planned for my invalid J-Cat. I regretted that I didn't buy a big cranberry cornbread from Amy's Bread the day before, because it was delicious and I really wanted more, and I didn't think I could duplicate it. But then I realized that I had a bag of fresh cranberries and I wasn't even planning to do anything with it that day, so why not?


The bread was simple - a classic sweet cornbread with the addition of halved cranberries. That used up about 1 cup of the berries, so the rest I boiled down into a cranberry sauce with spices and golden raisins. All in all it took no more than 30 minutes of prep time and I had two perfect dishes for even the smallest and laziest of Thanksgiving dinners. Recipes after the jump:


CRANBERRY SAUCE WITH GOLDEN RAISINS
3/4 cup water
3/4 cup sugar
3 cups fresh cranberries
1 cinnamon stick
1/2 tsp freshly grated nutmeg
1/2 cup golden raisins

Combine water and sugar in a medium saucepan and bring to a boil to dissolve sugar. Add the cranberries and return to boil. Lower to a simmer, add the cinnamon stick and nutmeg, and allow to simmer for 10 minutes until the cranberries burst. Remove from the heat and gently fold in the golden raisins. Allow to cool to room temperature, then store in the fridge. The sauce will thicken as it cools.


CRANBERRY CORNBREAD

1/2 cup butter, softened
2/3 cup sugar
2 eggs
1 1/2 cups all-purpose flour
1 cup cornmeal
2 teaspoons baking powder
1/2 teaspoon salt
1 1/2 cups buttermilk
1 cup cranberries, halved

In a mixing bowl, cream butter and sugar. Add eggs; mix well. Combine the flour, cornmeal, baking powder and salt. Add to creamed mixture alternately with buttermilk. Fold in cranberries.

Transfer to a greased 9-in. square baking pan. Bake at 375 degrees F for 40-45 minutes or until a toothpick inserted near the center comes out clean. Serve warm.

Continue Reading "respect the cranberry"

thanksgiving plate


Thanksgiving for two, enough food for twenty.

Continue Reading "thanksgiving plate"

Thursday, November 27, 2008

thanksgiving recovery

Thanksgiving, the holiday of eating. It's no surprise that it has always been my favorite holiday. But because of J-Cat's surgery the other day and a difficult recovery, we've decided that a quiet Thanksgiving at home with the kitties would be the best for both of our psyches. It's been a long long long week...

But a Thanksgiving for 2 humans and 2 felines does not mean a couple of frozen turkey dinners. I'm doing my best to find that compromise between hitting all our favorites and not going overboard. So, here's the menu plan, and all of the new recipes will be posted in the coming days:

Roast Chicken with Lemons (Yeah, they don't make 3-lb turkeys. And, to be honest, neither of us really likes turkey anyway.)
Chicken Gravy
Classic Bread Stuffing
Roasted Brussels Sprouts
Roasted Delicata Squash
Cranberry Cornbread
Fresh Cranberry Sauce with Golden Raisins
Nutmeg-Maple Cream Pie

What, is that too much for two?

Continue Reading "thanksgiving recovery"

Wednesday, November 19, 2008

on-set torture: squash & chickpea tajine


When you make food television, sometimes you sit around all day tortured by delicious aromas they you just CAN'T. EAT. YET. This recipe tops the list because not only did it take forever before all the shots were done, this incredibly aromatic dish was persistently gnawing at my senses, insisting that I would love anything that smelled like that. Cinnamon, cumin, garlic, onions, wafting, all over the studio, driving me crazy.

This recipe was also responsible for a rather exciting first day back on set, as Aida sliced her finger while chopping up some preserved lemon. I discovered that glopping on liquid bandage wasn't really going to work if it just kept bleeding and bleeding and the blood was diluting the liquid bandage. Then I discovered that the blood clotting spray in the first aid kit was a joke but might have made us giggly. Then I discovered that our EP Matt was strong and could possibly break Aida's finger while trying to apply pressure. Then I discovered that the tannic acid in a wet tea bag works as a natural coagulant. The more you know. Recipe after the jump:

SQUASH AND CHICKPEA TAJINE

1 tablespoon unsalted butter
1 tablespoon olive oil
1 medium yellow onion, small dice
4 medium garlic cloves, thinly sliced
2 teaspoons ground cumin
1 (3 inch) cinnamon stick
1 pound butternut squash, large dice
3/4 pound red potatoes, large dice
2 cups low-sodium chicken broth
2 cups cooked chickpeas, drained
1 (14 ounce) can diced tomatoes with juices
Pinch saffron threads
1/2 preserved lemon, finely chopped
1 cup brined green olives (recommend: Cerignola)[note: I used Moroccan Oil-cured olives because they were pitted, cheaper, and Moroccan, which I thought was fitting]
Fresh cilantro, roughly chopped, for garnish
Toasted slivered almonds, for garnish
Plain Greek yogurt, for garnish
Steamed couscous, for serving

1. Heat butter and olive oil in a 3- to 4-quart Dutch oven or heavy-bottomed saucepan with a tightfitting lid over medium heat. When oil shimmers, add onion, garlic, cumin, and cinnamon, and season with salt and freshly ground black pepper. Cook, stirring occasionally, until spices are aromatic and onions is just soft and translucent, about 5 minutes.
2. Add squash and potatoes, season with salt and freshly ground black pepper, stir to coat, and cook until just tender, about 3 minutes. Add broth, chickpeas, tomatoes and their juice, and saffron. Bring mixture to a boil then reduce heat to low. Cover and simmer until squash is fork tender, about 10 minutes.
3. Remove from heat and stir in preserved lemon and olives. Serve over couscous garnished with cilantro, almonds, and yogurt.

Continue Reading "on-set torture: squash & chickpea tajine"

ouch


Poor J-Cat. Surgery on Monday.

Continue Reading "ouch"

Thursday, November 13, 2008

emergency cookies: white chocolate cherry chunkers


Oh my. What a week I've had. Such a week that I can't even remember when I made these cookies or how I had the energy or time. But it's a good thing I did, because it turns out that J-Cat is practically surviving on them. On Saturday night, my manchild of a boyfriend broke his upper arm skateboarding and now is pretty much unable to do anything. Between multiple visits to the hospital and the realization that I have to do quite a lot to help him (imagine all the things you can't do with only one arm) and a severe lack of sleep, I'm wondering if perhaps I baked these cookies in the middle of the night. Luckily, these hearty white chocolate cherry chunk cookies are full of oats and relatively low on sugar, so when I go to work and leave the gimp alone at home all day, he can easily eat these rather than try to get something off of a shelf or whatever.


The recipe comes from the new book The Sweeter Side of Amy's Bread, with some minor modifications from me to reduce the sugar (I always do that, as I actually don't like really sweet desserts), and increase the fiber. I also made smaller cookies than the recipe suggests, so I have adjusted the cooking time to account for it. Amy's Bread is an incredible bakery that constantly strives to thwart all of my attempts to lose weight. It's right downstairs from my office. It's magical. Recipe after the jump:


WHITE CHOCOLATE CHERRY CHUNKERS
Adapted from The Sweeter Side of Amy's Bread
(Makes 36 small or 12 large cookies)

1 cups unbleached all-purpose flour
2/3 cup whole wheat pastry flour
2 1/4 cups old-fashioned rolled oats
1 1/4 teaspoons baking soda
1/2 teaspoon kosher salt
2 large eggs
1 1/4 teaspoons vanilla extract
1 cup dried tart cherries
3/4 cup white chocolate chunks or chips
1 cup unsalted butter, slightly softened
1/2 cup firmly packed dark brown sugar
1/3 cup granulated sugar

1. Position one rack in the top third of the oven, one rack in the bottom third of the oven, and preheat the oven to 350ºF. Line the cookie sheets with baking parchment.

2. In a bowl, add the flour, oats, baking soda, and salt and whisk together. In a separate bowl, whisk together the eggs and vanilla. In another large bowl, add the cherries and white chocolate and toss gently to combine.

3. In another bowl, using an electric mixer with a paddle attachment, cream together the butter and sugars on medium speed for 2 minutes, or until light and fluffy, scraping the sides and bottom of the bowl frequently. Gradually add the egg mixture until everything is well combined.

4. With the mixer on low speed, add the flour mixture in stages. Mix only until everything is well combined, scraping the sides and bottom of the bowl frequently. There should not be any pockets of dry flour left in the dough. Add the cherries and chocolate and mix again on low speed until everything is evenly distributed. If you're using a mixer that has beaters instead of a paddle, you may want to fold these last ingredients in by hand with a wooden spoon or a rubber spatula.

5. Using a large soup spoon, a metal ice cream scoop, or your clean hands moistened with water, scoop out small balls of dough and place on lined baking sheet. Press down lightly to flatten them to a thickness of about 1 inch. They will spread a lot during baking. Bake the cookies for about 14 minutes, rotating the cookies halfway through the baking time. They should be golden brown and baked all the way to the center. They should be soft, but be careful not to underbake them or they'll be doughy and will fall apart easily.

6. Let cookies cool on the sheets for 5 minutes, then move them to a rack and cool completely before serving.

Continue Reading "emergency cookies: white chocolate cherry chunkers"

Friday, November 07, 2008

another vat of goodness


Okay, maybe some of these vat dinners are getting repetitive. Rice, beans, greens, a touch of meat, how many variations of this have I made already? The thing is, this theme has countless variations, and somehow many of them are awesome. This time it was brown basmati rice, collard greens, black-eyed peas, and a bit of andouille. I went with the influence of southern ingredients and threw some dashes of tabasco in for a familiar bite. Recipe after the jump:


BLACK-EYED PEA, COLLARDS, AND ANDOUILLE RICE SALAD

1 cup brown basmati rice
4 ounces andouille sausage, diced
1 medium onion, diced
2 cloves garlic, minced
1 bunch collard greens, cut into thin ribbons
1 15-oz can black-eyed peas, drained and rinsed
1 tbsp dried tarragon
1 tsp smoked paprika
1 tsp cayenne pepper
a few splashes tabasco sauce, to taste
salt and pepper, to taste

In a medium saucepot, combine rice with 2 cups water and bring to a strong boil. Lower to a simmer, cover, and cook for 40 minutes or until water is absorbed and rice is tender. Fluff with a fork and set aside.

In a large saute pan over medium heat, saute the sausage until browned and letting out fat. Add the onions and garlic and saute for a few minutes until onions are translucent. Add the collards and saute until wilted. Add the beans, tarragon, paprika, cayenne and tabasco sauce and saute until beans are heated through.

In a large bowl, combine the collards and beans with the rice and toss well. Taste and adjust for seasoning. Serve warm or at room temperature.

Continue Reading "another vat of goodness"

Tuesday, November 04, 2008

maple nut & pear scones


The aroma of these hearty scones baking on Sunday morning was intoxicating. My attempt at a healthy weekend breakfast was thwarted, however, by my inability to stop myself from eating FOUR of them. Then another for dessert. And another the next day. If you are craving the flavor of fall in an addictive, filling, not-too-sweet bread item, this is the scone for you. Recipe after the jump:


MAPLE NUT & PEAR SCONES
Adapted from Eating Well

1 cup whole-wheat pastry flour
1 cup all-purpose flour
1 cup old-fashioned rolled oats
¼ cup plus 1 ½ teaspoons sugar, divided
2 teaspoons baking powder
½ teaspoon baking soda
¼ teaspoon salt
1 teaspoon ground cinnamon
4 tablespoons chilled reduced-fat cream cheese (Neufchâtel), cut into small pieces (2 ounces)
2 tablespoons chilled butter, cut into small pieces
¼ cup canola oil
1 cup diced peeled pears, preferably Bartlett (about 1 large)
½ cup chopped pecans or walnuts, divided
¾ cup low-fat buttermilk
1 teaspoon maple extract or vanilla extract
1 egg lightly beaten with 1 tablespoon water for glaze

1. Preheat oven to 400°F. Line a large baking sheet with parchment paper or coat with cooking spray.

2. Combine whole-wheat flour, all-purpose flour, oats, 1/4 cup sugar, baking powder, baking soda, salt and cinnamon in a large bowl; whisk to blend. Using a pastry blender or your fingertips, cut or rub cream cheese and butter into the dry ingredients. Add oil and toss with a fork to coat. Add pear and 1/4 cup nuts; toss to coat. Mix buttermilk and maple (or vanilla) extract in a measuring cup and add just enough to the dry ingredients, stirring with a fork, until the dough clumps together. (It will be sticky.)

3. Turn the dough out onto a lightly floured surface and knead several times; do not overwork it. Divide the dough in half and pat each piece into a 7 1/2-inch circle. Cut each circle into 6 wedges and transfer to the prepared baking sheet. Brush the tops with the egg glaze and sprinkle with the remaining 1/4 cup nuts, pressing lightly. Sprinkle with the remaining 1 1/2 teaspoons sugar.

4. Bake the scones until golden and firm to the touch, 20 to 30 minutes. Transfer to a wire rack to cool slightly before serving.

Continue Reading "maple nut & pear scones"

Monday, November 03, 2008

sunday supper: pasta e lenticchie


Homey, filling, simple and tasty, all the makings of a perfect Sunday Supper on a chilly fall day. It's a one pot meal that results in a rich-tasting but ultimately extremely healthy dish. A very classic dish from the Campania region, it is often made using the odds and ends of leftover pasta, or pasta mista. I used capellini, broken into 2-inch pieces, so that it would cook quickly in the same pot as the lentils. I also used way more pasta than the recipe actually calls for because I am a carb freak, so the proportions were probably pretty different. No matter, it was delicious. Recipe after the jump:


PASTA E LENTICCHIE (PASTA AND LENTILS)
Adapted from Naples at Table by Arthur Schwartz

6 cups water
3/4 cup lentils
2 large cloves garlic, crushed
3 tablespoons extra-virgin olive oil
1 cup chopped canned plum tomatoes, with some juice
2 teaspoons salt
1/4 teaspoon hot red pepper flakes
3/4 pound vermicelli or capellini, or small tubular pasta, or pasta mista
2 rounded tablespoons finely cut or snipped parsley
Optional: Extra-virgin olive oil and hot red pepper flakes or hot pepper oil for garnish

1. In a medium saucepan, bring the water to a rolling boil, add the lentils, and cook, covered over medium-high heat, until nearly but not entirely tender, about 20 minutes.

2. Add the garlic, the olive oil, the tomatoes, the salt, and the pepper. Reduce the heat, cover, and continue to simmer briskly for another 10 minutes, stirring a few times, or until the lentils are fully tender.

3. If using capellini, break it into 2- to 4-inch pieces and add them to the lentils. Cook, covered, at a steady simmer, stirring several times and scraping the bottom of the pot when you do. Cook until the pasta is just done, stirring more frequently as it gets closer to that point. If using a small tubular pasta or pasta mista, cook the pasta at least halfway in plenty of salted boiling water. Drain the pasta, add it to the lentils, and simmer to finish cooking the pasta.

4. When either pasta is cooked to taste, remove the pot from the heat, stir in the parsley, cover the pot, and let stand about 5 minutes before serving.

5. Serve hot, passing hot pepper oil or the best-quality extra-virgin olive oil for drizzling on top.

Continue Reading "sunday supper: pasta e lenticchie"