Friday, February 29, 2008

year of the rat-atouille


In honor of this year's Oscar winner for Best Animated Feature - Remy's Ratatouille, a version of the classic peasant dish inspired by the Thomas Keller-designed version in the movie. This one didn't come out quite so fancy looking, but it really was delicious. I'm talking J-Cat and I eating directly out of the casserole dish delicious. And it was so incredibly simple, I can't believe I've never made ratatouille before.

The only part that was remotely time-consuming was slicing the vegetables into the tell-tale super-thin rounds that characterized the movie's dish. Since I have a craptacular cheapo version of a mandoline, I ended up having to slice the eggplant and pepper by hand. But despite this, it was still quick enough.


I served this alongside a piece of Chilean sea bass that I simply salted and peppered and pan seared, plus toasted slices of peasant wheat bread spread with soft goat cheese. The fish was awesome, but the combo of the ratatouille with the goat cheese really stole the show. If not for my attempts to get some sort of protein in every meal, I would have been more than happy to stuff the veggies and bread and nothing else.


Recipe after the jump:

REMY'S RATATOUILLE
1 28-oz can diced plum tomatoes, drained
1 large shallot, minced
2 cloves garlic, minced
1 zucchini
1 yellow squash
1 Italian eggplant
1 red bell pepper
2 tbsp olive oil
5 sprigs fresh thyme, stripped from the stems
5 leaves fresh basil, cut into ribbons
salt and pepper

Preheat oven to 400 degrees. Line 10-inch diameter round or oval ovenproof casserole with the diced tomatoes, then scatter the shallots and garlic slices evenly. Sprinkle generously with salt and pepper. Using a mandoline or sharp knife, slice the eggplant, squash, and zucchini into very thin rounds. Slice off the top and bottom of the pepper and remove the seeds and ribs from the interior, taking care to keep the pepper intact. Layer the the slices concentrically from the edge of the dish toward the interior, alternating and overlapping the vegetables so that only a small sliver of each kind is visible. Sprinkle generously with salt, pepper, thyme leaves, and basil, and drizzle with olive oil. Bake in the oven uncovered for 20 minutes, then cover with foil for an additional 15-20 minutes until vegetables are tender and sauce is bubbling.

Continue Reading "year of the rat-atouille"

Tuesday, February 26, 2008

singapore-inspired chicken rice

I wasn't going to blog about the dinner I made last night. The main reason is that it was such a simple, utterly uninteresting-looking dish that I just didn't file it in my mental drawer for "Dishes to Blog About". But after we ate...and ate, and ate, and kept talking about it, I realized that it was actually such an awesome dish that I couldn't possibly keep it from you.

It was sort of my easy weeknight take on traditional Hainanese Singapore Chicken Rice, the national dish of Singapore. This is true homestyle cooking, and is simply boiled chicken with what some describe as "oily rice", rice that is cooked in chicken stock. The authentic way to make the dish apparently involves not only boiling the whole chicken in pork and chicken stock, but making a completely separate stock for cooking the rice. I don't know why exactly, but I wasn't going to boil a whole chicken on a Monday night anyway, so I just bought a carton of broth. In order to get the oily quality and more intense chicken-y flavor, I seared chicken thighs in a touch of oil first, then removed them from the pot and sauteed the ginger, scallions and the uncooked rice in that chicken fat before adding the broth and bringing to a boil. It did the trick. The rice was just the right amount of oily - not greasy like fried rice - and the flavor was spectacular. After the rice came to a boil, I returned the chicken to the pot, resting atop the rice, then lowered to a simmer and covered it for about 20 minutes, until the rice was tender and the chicken super juicy. I was all ready to have dipping sauces on the side - as they do in Singapore - like chili sauce, dark soy sauce, oyster sauce, etc., but there was so much flavor just as it was that I didn't even bother. Ah, comfort food. Recipe after the jump:

SINGAPORE-STYLE CHICKEN RICE
4 chicken thighs, with skin
2 1/2 cups uncooked Jasmine rice
4 cups chicken stock or broth
2 tsp toasted sesame oil
3 scallions, thinly sliced
1 3-inch portion of ginger, peeled and thinly sliced
1 tsp oil
salt and pepper, to taste

Wash and pat dry the chicken thighs, then salt and pepper liberally. In a large saucepan, heat the oil on high, then add the chicken thighs skin side down to sear until brown, about 5 minutes per side. Remove the chicken and set aside. You only need 3 or 4 tablespoons of fat in the pan, so if the chicken gave up much more fat, you can drain some off. To the fat in the pan, add the sliced scallions and ginger and saute for a couple of minutes to bring out the fragrance. Add the uncooked rice and saute another minute until the grains are coated with the oil. Add the chicken broth and bring to a boil. When it boils, add the sesame oil, stir the rice well, then lower to a simmer and add the chicken thighs back to the pot, laying atop the rice. Cover and simmer for 25-30 minutes, until the rice is cooked through. Top with additional chopped scallions.

Continue Reading "singapore-inspired chicken rice"

Monday, February 25, 2008

sunday supper: put the lime in the coconut


I had promised to make Mom and Gene Pernil now that I have my new All-Clad roasting pan courtesy of J-Cat on Valentine's Day. That meant that the majority of last night's Sunday Supper was nothing new to you, my dear loyal readers. But never wanting to leave you recipe-less, I did some ice cream experimenting for dessert, and was pleasantly surprised by the result. I wanted to stick with the tropical flavors, so my first thought was a simple coconut ice cream. But about 10 minutes before the ice cream was done churning, while I was sitting and worrying that the ice cream would be way too sweet, something occurred to me. Lime. Put the lime in the coconut. My answer to something being too sweet is often to add something acidic, so this seemed perfect. A touch of acid, a fresh flavor, but a nice sweetness of its own. I wasn't sure if adding it would mess with the freezing process, but it had already been churning for 20 minutes so I figured it couldn't do too much damage. I'm guessing that if I had thought of it earlier and added the lime juice and zest earlier, it would have been fine as well, next time I will try it that way and see if there is any difference. Happily, it worked well and I really loved the flavor dimension that it added. This is definitely a keeper. Recipe after the jump:


COCONUT LIME ICE CREAM
1 1/2 cups whole milk
1 15 ounce can cream of coconut (preferably Coco Lopez)
1 1/2 cups heavy cream
juice and zest of one lime

In a food processor or blender, combine milk and cream of coconut and process until well combined. Slowly add in the cream. Once it is blended, transfer to the ice cream maker and freeze according to manufacturers directions. About halfway through the churning process add the lime juice, then slowly sprinkle in the zest. Avoid adding the zest in clumps so that it distributes evenly throughout the ice cream. After churning, freeze for at least two hours before serving. Makes about 2 quarts.

Continue Reading "sunday supper: put the lime in the coconut"

stuff breakfast


Chocolate for breakfast, can you really get away with it? I say, if it's sandwiched between two healthy slices of bread, why not? It's also 70% cocoa, it's not like I was sugar loading. It was just a simple way to make French toast a little more fun, when the only bread in the house was this whole grain thin sliced Health Nut bread. Turns out, that Health Nut bread was kind of awesome for french toast because the nuts worked perfectly with the melty chocolate center, and the bread itself has a touch of sweetness. Since chocolate alone is a little hardcore for me, I also stuffed it with ricotta cheese. The result was pretty yummy, and not nearly as sweet as I worried it might be. Recipe after the jump:


CHOCOLATE STUFFED FRENCH TOAST
(Serves 2 hungry people)
6 slices bread of your choice (I used Arnold Health Nut bread because it's what I had, and I actually do recommend it for its sweet nuttiness. At least you're getting fiber...)
3 large eggs
splash of milk
1-2 tbsp sugar
1 tsp vanilla
1/2 tsp cinnamon
6 tbsp part skim ricotta cheese
12 tsp bittersweet chocolate, cut into small chunks or chips
butter or nonstick spray for pan frying

Cut the crusts off of the bread and spread with 1 tbsp of ricotta cheese, sprinkle with about 2 tsp of chocolate, then top with another slice of bread and press lightly to seal the edges. Repeat with remaining bread slices to make three sandwiches. In a large shallow dish, whisk together the eggs, milk, sugar, cinnamon, and vanilla. Heat a nonstick skillet over medium heat and spray with nonstick spray or butter. Soak each sandwich in the egg mixture for a couple of minutes per side until saturated. Pan fry for about 3-4 minutes per side until golden brown. Serve sliced in half on the diagonal and topped with powdered sugar, with maple syrup on the side. This would also be great topped with fresh sliced strawberries.

Continue Reading "stuff breakfast"

Friday, February 22, 2008

mapo tofu


Mapo Tofu is classic homestyle Szechuan cooking. To me, that means comfort food. It's not something that you see on too many menus at Chinese restaurants, whether it's a take-out joint or a classy joint. Perhaps that's because it's not really an attractive dish, or it's too peasanty, who knows. My dad used to make various versions of this dish, never the same twice, and I'm not even entirely sure that there is one specific way that is truly authentic. Mine is certainly far from authentic because I too never make it the same way twice. But the constants are simple: tofu, minced meat, and spicy.


My simple way to get spicy is from chili garlic sauce. I think the real way involves Szechuan peppercorns, which are not easy to find (until recently they were not available here at all), but this sauce serves its purpose just fine. I used ground pork this time, but I often use ground beef, and for some reason I always throw in edamame now, I just like the contrast in texture. This is by no means an authentic recipe, but it's quick and easy and really satisfying. Recipe after the jump:


EASY (FAKE) MAPO TOFU

1 tbsp peanut or vegetable oil
1/2 pound ground beef or pork
1/4 teaspoon salt
1 package firm tofu (not silken)
2 tablespoons chili paste or chili garlic sauce (or more, depending on your preference)
1 teaspoon black bean paste
1/4 cup chicken broth or chicken stock
1 cup frozen shelled edamame
3 scallions, chopped

In a large heavy skillet or saute pan, heat oil, then crumble, salt, and brown meat. Add chicken stock, chili sauce, and black bean paste. Cut the tofu into 1-inch cubes, add to the pan, and allow to simmer for 5 minutes or until heated through. If the mixture is too dry, add additional stock. Add the frozen edamame and most of the scallions (hold back some for garnish), simmer an additional 5 minutes or until edamame are cooked. If the mixture is too soupy, make a slurry of cornstarch and water, add to the pan and simmer until desired consistency. Serve over steamed white rice and garnish with chopped scallions.

Continue Reading "mapo tofu"

Tuesday, February 19, 2008

one down, eight to go


This is the kind of story that I need when I'm feeling a little glum. Little Georgia, a 7-month-old black cat, escaped from her carrier at the 59th St. 6 platform on her way home from getting fixed almost a month ago. The happy story is that not only was Georgia found, the story of how she was found is unbearably sweet. A couple of days ago, a Con Ed worker reported hearing meows down in the tunnel under Lexington Ave. just a few blocks away from where she disappeared. Hearing this, two MTA track workers were so determined to find her that they walked up and down the tracks in the vicinity meowing! Finally, one of them meowed and heard a tiny meow in reply. At first, he thought it was the other worker, but then found the real source. When he reached out for her, little Georgia licked his hand. Aw, I'm plotzing. Georgia was dehydrated and suffered a fractured leg, but underwent surgery today and appears to be doing well. MTA track workers Efrain LaPorte and Mark Dalessio, and Con Ed worker Chris Cuddy are my heroes. They are splitting the $1500 reward three ways, and Cuddy says that he will donate his share to the ASPCA.

Continue Reading "one down, eight to go"

Monday, February 18, 2008

sunday supper: the lazy donut


I have very romantic visions of pioneer life, made up of a jumble of ridiculous episodes of Little House on the Prairie and more realistic, often harsh stories from Laura Ingalls Wilder's original books. One of the things I love most about the books is the focus on food, whether it's the work that goes into preserving food for winter, the various techniques for different parts of the animal, or little Almanzo's constant obsession with eating in Farmer Boy. Reading about the simple homemade desserts is what really seems to get me, and I've always dreamed about apple fritters, cooking in a cast iron skillet on a wood burning cast iron stove. I'm not even sure she writes about apple fritters, but I definitely know that Caroline made them on the show for that party where Laura and Mary invited the girls from town and Nellie made fun of them for being country girls. Everybody loved Ma's apple fritters.


I don't have an apple corer, but I was determined to keep the apple slices as rings, so that was the only really hard part of this recipe. Now that I know how delicious these are, I obviously have to go buy an apple corer. The batter was incredibly simple, just flour, sugar, cinnamon, milk, and eggs.


Just the act of beating the egg whites stiff causes the batter to puff up when fried, the coating becoming light and airy and subtly delicious.


The final result was like a delicious light donut or a beignet with a sweet apple surprise in the middle. Even the act of frying was simpler than I anticipated, and I only burned myself once!


A dusting of powdered sugar was an essential step, it gave just the right touch of sweetness to the otherwise subtle dessert. It made me feel like I was on the prairie, except for the fact that that stupid Knight Rider movie was on and it was really terrible. Recipe after the jump:


APPLE FRITTERS
4 firm apples, anything used to cook would work, as long as it is not too tart
1/4 cup lemon juice
3 tbsp brown sugar
1 cup all purpose flour
1/4 cup sugar
1/2 tsp ground cinnamon
1/2 tsp salt
2 eggs, separated
grated rind of 1 lemon
1/2 cup milk
vegetable oil for frying
confectioner's sugar for dusting

Grate the lemon rind and set aside for later use. Peel and core the apple, slice into 1/4 inch rings, and place in a shallow dish. Mix the lemon juice and brown sugar and pour over the apples. Set aside to marinate for 1 hour.

Combine the flour, sugar, salt and cinnamon in a large mixing bowl. In a separate small bowl, whisk the egg yolks with the milk and lemon rind and add to the dry ingredients, mixing to combine well. In a large bowl, whip the egg whites to stiff peaks. Gently fold the whites into the batter. Do not overmix, it is okay if there are white streaks in the batter. Heat about 1/2 inch to 1 inch of oil in a cast iron skillet until 350 degrees or a piece of bread sizzles and browns. Remove the apple slices from the lemon juice and coat with the batter (this may take some coaxing as the batter will not easily stick). Gently drop the slices into the hot oil with tongs, do not overcrowd the pan, this should be done in batches. Fry on the first side until golden brown, about 2 minutes, then carefully flip (I used two chopsticks) and fry on the other side another minute. Drain on papertowels. Top with a dusting of confectioner's sugar. These are best eaten right away, but you can reheat and recrisp leftovers in a toaster oven.

Continue Reading "sunday supper: the lazy donut"

sunday supper: the lazy chicken


This is a magical recipe. A recipe so unbelievably simple you can't believe that it will be great, but it is always great. I rarely roast a chicken, but from now on, I will only do it this way. I've tried so many other recipes that require so much more work, and none of them are ever as delicious, juicy, and wonderful as this one. It is Marcella Hazan's Roast Chicken with Two Lemons. And that is literally all it is. It is a chicken, and two lemons. Okay, and some salt and pepper, but that's it. Take two lemons and poke a bunch of holes in them. Stick them in the bird, truss the opening up with toothpicks or string, rub some salt and pepper all over, stick in the oven and that's it. You turn it over once, you never baste it, you just leave it alone. Miracle chicken. When you cut into this thing, the juice practically bursts out of it.


Of course, that meant that I could turn my attention to a side dish that is perhaps a little bit more interesting than some blanched veggies with lemon and oil, which I always do. I was craving cauliflower and came upon a recipe for the Cauliflower Gratinate that they serve at Batali's Pizzeria Mozza in LA. This is a classic example of taking something healthy and making it completely, utterly unhealthy. But in such a delicious way.


I don't think the health benefits of the cauliflower can fight through the butter, oil, and cream in this recipe.


Such a well rounded meal. Well rounded in fat sources. I worked out a little extra hard this morning...recipes after the jump:


ROAST CHICKEN WITH TWO LEMONS
From Marcella Hazan's Essentials of Classic Italian Cooking

1 3-4 lb chicken
2 small lemons
salt and pepper

Preheat oven to 350 degrees. Wash the chicken in cold water inside and out and dry very well with paper towels. Be sure to drain all water from the cavity of the bird. Salt and pepper inside and out very generously and rub well into the skin. Using a trussing needle or strong toothpick, poke about 20 holes in each lemon. Place the lemons in the cavity of the bird, then close the cavity with toothpicks or a trussing needle and kitchen string. Tie the legs together loosely with kitchen string, they can lie in their natural spots, this is just to prevent them falling to the side and splitting the skin. Place in a roasting pan breast side down and place in the oven for 30 minutes.

After 30 minutes, turn the chicken breast side up trying not to break the skin, and return to the oven for 30-35 minutes. Then turn the oven up to 400 degrees and roast an additional 20-30 minutes depending on the size of the bird. Figure about 20-25 minutes per lb of total cooking time. My bird was a little over 4 lbs, so I roasted for a total of about 90 minutes. Remove the bird and allow to rest 10-15 minutes before carving. Be careful if you are removing the lemons, they are still full of piping hot juice. Josh and I like to carefully cut the lemons in half and squeeze the juice onto our pieces of chicken.


CAULIFLOWER GRATINATE
From Pizzeria Mozza

2 tablespoons extra-virgin olive oil
2 tablespoons butter
1 Spanish onion, peeled, halved and cut into 1/4-inch slices
10 cloves garlic, peeled and thinly sliced
2 teaspoons kosher salt
1 head of cauliflower, stem removed, cut or pulled into 2-inch chunks
2 cups heavy cream

Preheat oven to 450 degrees. Place a heavy saucepan, preferably 10 inches wide with a 3-to 4-quart capacity, over medium heat and combine olive oil, butter, onions, garlic and 1 teaspoon of salt. Cook over low heat, covered, for 3 minutes.

Stir in the cauliflower, heavy cream and remaining 1 teaspoon of salt. Bring ingredients to a boil, then reduce to a simmer and cook for 8-10 minutes, until cauliflower is tender. Using a slotted spoon, carefully remove the cooked cauliflower and put it into a medium-sized mixing bowl.

Continue to cook until the cream is reduced by half (about 3 to 5 minutes). When the cream has reached a rich, thick consistency, add to the bowl with cauliflower, stir to combine, then place into a casserole dish and bake for 30 minutes, until brown. Allow to cool for a few minutes, then serve.

Continue Reading "sunday supper: the lazy chicken"

Saturday, February 16, 2008

biscuits & gravy!

Exclamation point! J-Cat and I both really love classic biscuits with white sausage gravy. One of the first times we hung out on a maybe date (this time around, not in high school) we went and had biscuits and gravy at the now defunct Union Picnic. Ever since then, we've made it a point to try any place in our general area that has the dish. We're usually pretty disappointed. Union Picnic was inconsistent; a couple of times they were awesome, a couple of times they were strange or mediocre, and at least once they were just awful. Pies N Thighs, also gone, were the best in the hood, and Brooklyn Label's are passable but lacking in flavor. Like the ever elusive great hash browns, biscuits and gravy are not easy to come by. But now, I've finally done it. I finally made my own. For some reason, I've long been afraid of making my own white gravy. I have no idea why. I've made roux, I've made bechamel, it's really not that different. And I'm so glad I tried, because these finally satisfied our cravings.


The first step is, of course, to make the biscuits, which I do all the time because I love buttermilk biscuits and they are also less popular around here than they should be. My twist for these was the fat. The other night when I made bucatini all'amatriciana, I saved some of the excess rendered fat from the guanciale and stashed it in a jar in the fridge. And what better way to use some cured pork fat than in biscuits?


I used about 3 parts guanciale fat to 1 part butter, mostly because I still thought the butter flavor would be desireable. I don't know if it really is because of the fat, but these biscuits seemed to rise much higher and fluffier than they usually do.


Now on to new territory, the gravy. I started with a pound of pork sausage, one of those big old tubes with no casing. And of course, if you want to make it the real way, you must do it in a cast iron skillet.


The next step was to remove the sausage from the fat and start the roux. It starts out pretty white...


...but eventually turns a lovely deep golden.


Finally, you add the milk and whisk vigorously until it thickens.


The sausage goes back in, and you're done.


Split the biscuits, top with the sausage gravy, and if you really want to clog those arteries, throw a poached or fried egg on top. Deadly delicious. Recipes after the jump:


BISCUITS AND GRAVY

For the biscuits:
2 cups flour
4 tsps baking powder
1/2 tsp baking soda
1/2 tsp salt
4 tbsp fat, chilled (any combination of butter, lard, bacon fat, or shortening will do. If I don't have meat fat, I use half butter, half shortening)
1 cup chilled buttermilk

Preheat the oven to 450 degrees. Combine the flour, baking powder, baking soda, and salt in a large mixing bowl. Using your fingertips, mix in the cold fat until it becomes a coarse meal, working as quickly as possible so that the fat does not melt. Make a well in the center of the flour mixture and add the buttermilk. Stir just until the dough forms, it will be sticky. Turn out onto a floured board and fold over onto itself 5 or six times, then pat into a 1-inch thick round. Use a biscuit cutter of your preferred size, I often make mine about 3 inches in diameter. Place on a baking sheet with the edges of the biscuits touching. Bake for 15-20 minutes until the tops are golden brown. Remove to a wire rack and allow to cool. Makes about 6 3-inch biscuits

For the gravy:
1 pound pork breakfast sausage, crumbled
4 tbsp flour
3 cups milk
salt and pepper

In a large heavy skillet, brown the crumbled sausage well, then remove from the fat with a slotted spoon to a plate lined with paper towels. Keeping the heat on medium, add the flour to the fat 1 tablespoon at a time, whisking constantly to avoid burning. Add the next tbsp of flour when the roux turns brown. When the last of the flour is incorporated and the roux is a golden brown, add the milk 1 cup at a time, whisking constantly to avoid clumping. When all the milk as been added, reduce heat to low, add back the sausage, and allow to simmer, stirring occasionally, until the gravy has thickened to your liking. Season with salt and pepper to taste; it may require more salt than you realize. Serve the gravy over the split biscuits and top with a poached or fried egg.

Continue Reading "biscuits & gravy!"

Friday, February 15, 2008

true love pasta


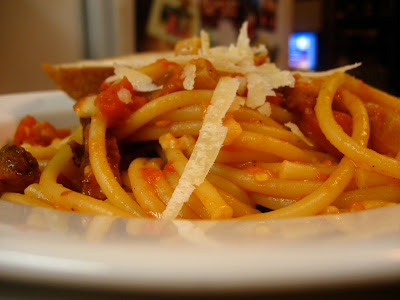
When I think of Valentine's Day, I think of love. And when I think of love, I think of pasta. A couple of weeks ago, the topic of Bucatini all'Amatriciana came up repeatedly in the span of a couple of days. First, Beth mentioned it a couple of times as her favorite pasta to make. While we were cheese-hunting down in the Italian market, she snatched up a giant package of bucatini and some pancetta. Earlier that same day I had read an article in The New York Times about pasta all'amatriciana and it's many variations across Italy, but one key constant was given - that it must be made with guanciale, the cured, unsmoked jowl of the pig. (I told Beth what I had read, but she decided to stick with the cured meat that she knew). Guanciale is only just becoming widely available in America, so I don't blame her for being cautious. I think I've had it maybe twice in my life and I can't say I remembered just what it tasted like. The very next day, I was lazing around the house watching Lidia Bastianich make some classic Roman pastas and wouldn't you know it, she was making Bucatini all'Amatriciana! It was like a sign from above, I must make it, I must go back to the Italian market and grab a chunk of guanciale and prove to myself once and for all that it is meant to be.


And let me tell you, that meat really did make all the difference. It's all about the fat. So much fat. And how delicious that fat is. Almost gamey in its intensity, I chopped the guanciale into lardons and cooked them in olive oil until they were very crispy. That, of course, left me with an almost obscene amount of oil in the pan, far more than I would need for the pasta, so I decided to drain some of that off and stash it in the fridge. Call me crazy, but I think that fat is destined for some buttermilk biscuits this weekend.

Another key ingredient in all'amatriciana is the hot peperoncino. I may have gone slightly overboard with that last night - our lips were burning - but I figure some heat is good for a night that's supposed to be about passion.


Recipe after the jump:

BUCATINI ALL'AMATRICIANA

1 pound bucatini (or perciatelli if that's all you can find)
1 tbsp olive oil
1/2 pound guanciale, chopped into small chunks
1 medium onion, diced
2 cloves garlic, minced
1 28-ounce can whole San Marzano tomatoes, chopped or crushed by hand
1 tsp dried peperoncino or hot red pepper flakes
salt and pepper, to taste
1 cup grated pecorino romano

PREPARATION
Heat the olive oil in a large saute pan, then add the guanciale and allow to crisp well. Remove the guanciale with a slotted spoon and let drain on paper towels. Pour off the fat, leaving 2 or 3 tbsp in the pan. Saute the onions in the fat until translucent, then add the garlic for a minute or two. Find a hotspot in the pan and sprinkle the peproncino, allowing to toast for a minute. Add the tomatoes and the guanciale, then bring to a simmer for 10 minutes while the pasta cooks. When the pasta is just short of al dente, drain and add to the sauce, tossing well to coat. Add half of the cheese and toss well, adjusting salt and pepper to taste. Serve immediately topped with the remaining cheese.

Continue Reading "true love pasta"

chocolate love


Valentine's Day always seems to be about chocolate. I'm actually not a big chocolate freak, and as a result I don't have much experience cooking with chocolate. But I do know that since I really don't eat it very much, I think it's worth it to eat truly great chocolate when I do. Hence, Scarffen Berger, considered one of the best baking chocolates in the world.


It's clear as soon as you look at this chocolate that it is great quality. The shine, the color, the aroma are all really gorgeous. Any old chocolate doesn't do much for me, but when I have some great chocolate in my hands, I start to understand the passion.


Dessert last night were these Mini Orange Chocolate Chunk Cakes, from a recipe by Ina Garten that I saw on her show ages ago. These are simply chocolate chip buttermilk cakes infused with an orange syrup and topped with chocolate ganache. I did make a couple of key adjustments. First, though I used semisweet chips for the actual cake, I decided to make the ganache with 70% bittersweet chocolate. I had made these once before and found the sweetness overwhelming, so this was my compromise. I also split the cakes in half. The main reason for this was because I couldn't get them out of the pan whole. But the happy accident was that I was able to pour the orange syrup onto both halves and it infused the cakes much more than they would have otherwise.


I reassembled the cakes before topping them with the ganache, but when we were eating them realized that it would have been smarter to stick the two halves back together with the ganache. I also didn't do a great job melting the chocolate for the ganache; there was just a bit of crystallization, it probably could have used a bit more cream, and I think I was a little impatient. The end result was still pretty delicious and decadent, and it was a fitting chocolatey end to our Valentine's dinner. Recipe after the jump:


Mini Orange Chocolate Chunk Cake
Adapted from a recipe by Ina Garten

1/4 pound unsalted butter at room temperature
1 cup sugar
2 extra-large eggs at room temperature
1/8 cup grated orange zest (2 large oranges)
1 1/2 cups all-purpose flour plus 1 tablespoon
1/4 teaspoon baking powder
1/4 teaspoon baking soda
1/4 teaspoon kosher salt
1/4 cup freshly squeezed orange juice
3 ounces buttermilk at room temperature
1 teaspoon pure vanilla extract
1 cup good semisweet chocolate chips

For the syrup:
1/4 cup sugar
1/4 cup freshly squeezed orange juice

For the ganache:
4 ounces good bittersweet chocolate, chopped
1/4 cup heavy cream
1/2 teaspoon instant coffee granules

Preheat the oven to 350 degrees F. Grease and flour 6 individual serving baking molds, such as the flexible non stick 100 percent silicone molds. (I only had cupcake tins, so I adjusted the cooking time accordingly)

Cream the butter and sugar in the bowl of an electric mixer fitted with the paddle attachment for about 5 minutes, or until light and fluffy. Add the eggs, 1 at a time, then the orange zest.

Sift together 1 1/2 cups flour, the baking powder, baking soda, and salt in a large bowl. In another bowl, combine the orange juice, buttermilk, and vanilla. Add the flour and buttermilk mixtures alternately in thirds to the creamed butter, beginning and ending with the flour. Toss the chocolate chunks with 1 tablespoon flour and add to the batter. Pour into the pans, smooth the tops, and bake for 20-25 minutes, until a cake tester comes out clean. Let the cakes cool in the molds on a wire rack for 10 minutes.

Meanwhile, make the syrup. In a small saucepan over medium-low heat, cook the sugar with the orange juice until the sugar dissolves. Remove the cake from the pans, put them on a rack over a tray, and spoon the orange syrup over the cakes. Allow the cakes to cool completely.

For the ganache, melt the chocolate, heavy cream, and coffee in the top of a double boiler over simmering water until smooth and warm, stirring occasionally. Drizzle over the top of the cakes.

Continue Reading "chocolate love"

Wednesday, February 13, 2008

a cobbler compromise


I would never try to claim that a cobbler is healthy. I can pretty much promise you that I would never bake something without butter, and I am adamantly against the idea of substituting something like apple sauce for fat. This is not a texture I'm interested in. I love my desserts, but I would sooner do without any than eat a fat free dessert that feels like rubber. But I do believe that there are a few compromises that can be made that doesn't negatively affect the end result, and that might make you slightly more inclined to eat some baked goodness without feeling totally guilty about it.


It's lucky for me that I often prefer a fruity dessert over a rich, creamy, or chocolately dessert. Granted, I like that fruit to be in close proximity to pastry, but I think I could do worse in many cases. Fruit, like the mixed berries in this cobbler, doesn't require very much added sugar. And since frozen fruit works so well for recipes like this, you can make it any time of the year.


All that's needed to accompany the fruit is the biscuit topping, and there are two easy fixes that you wouldn't even notice. 1: Replace half the flour with whole wheat pastry flour. I had long experimented with substituting whole wheat flour and running into texture problems, but if you can find whole wheat pastry flour you are likely not to notice it. It is ground much more finely than regular flour. 2: Continue to use butter, but sub out part of it for a healthier fat, like Safflower oil.

Finally, a biscuit topping made with buttermilk, especially low fat buttermilk, is not only fluffier and lighter, but somewhat healthier. This is not a change I made to a classic biscuit topped cobbler, I've always used buttermilk, it's just that now that I know more about buttermilk I can feel good about it.


And of course, the best thing you can do for you health is to bake the cobbler while your loved ones are napping on the couch. Mostly, that just ensures that none of the ingredients are surreptitiously stolen before the dish is finished. Recipe after the jump:


MIXED BERRY COBBLER COMPROMISE
2 12-ounce packages frozen mixed berries, defrosted
3 tbsp sugar
3 tbsp whole wheat flour
1 tsp grated orange zest

For the biscuit topping:
1/2 cup all purpose flour
1/2 cup whole wheat flour
3 tbsp sugar
1 tsp baking powder
1/2 tsp baking soda
1/2 tsp salt
4 tbsp chilled unsalted butter, cut into small pieces
4 tbsp safflower oil, or other heart healthy oil
2/3 cup low fat buttermilk

PREPARATION
Preheat oven to 350. Toss the berries with the sugar, flour and orange zest and set aside while you assemble the biscuit mixture. In a large bowl, combine flour, sugar, baking powder, baking soda, and salt. Cut in the chilled butter with a pastry cutter or your fingertips until mixture resembles a course meal. In a small bowl or measuring cup, whisk together the oil and buttermilk, then add to the flour mixture until just combined. Do not overmix or the biscuits will become tough.

Spray an 8x8 baking dish with nonstick spray and fill with the berry mixture. Using a large spoon, dollop the batter into individual biscuits on top of the berry mixture. I made five biscuits but they turned out quite big for a serving, I think this recipe would make 8-10 nicely sized portions. Bake in the preheated oven for 45 minutes, until the biscuits are browned and a toothpick comes out clean. Let sit for at least 10 minutes before serving.

Continue Reading "a cobbler compromise"

Tuesday, February 12, 2008

national pancake day


For any readers who might be disappointed at that previous health-minded post, I wanted to add that today is National Pancake Day. IHOP is having a special charity day, giving away a free short stack of pancakes to all diners from 7AM to 10PM. They ask that you donate what you would have spent on the pancakes to Children's Miracle Network. They are aiming to raise $750,000 today. So, go eat pancakes for a good cause!

Continue Reading "national pancake day"

fighting against the food

This weekend was a concert weekend, so I wasn't able to cook. Sunday supper was at the Polish place on Bedford Ave. with Mom, Gene, Olivia, and J-Cat. I spent most of the meal really jealous of what Gene and Mom ordered - Hungarian Goulash with Potato Pancakes. So freaking good. But J-Cat made me really happy when he ordered cheese blintzes with plum butter. I could not stop eating them. And, unfortunately, that's the way I've been with a lot of food lately - I CAN'T. STOP. EATING. I could blame it on the cold weather, I suppose. In any case, I am trying to eat much healthier, at least on the weekdays. I'm basically giving myself a pass on Sunday Suppers, though. I can't enforce any restrictions on those.

In an effort to counteract some of the eating, I have started a new strength workout that I'm really enjoying. They are called "Kettlebells", and are a traditional Russian cast iron ball weight with a handle. Here's a picture of kettlebells very similar to the one I got:


It has - dare I say - some personality, no? Or am I just a sucker for exercise equipment? Kettlebells seem to have a long tradition of being a macho guy sort of exercise, but I guess they're becoming more and more popular with the ladies. What I love about them is that they're simple, functional exercises that require little space and little time. Plus, although they are mostly a strength exercise, your heartrate shoots up and you get your cardio without feeling like you're doing cardio. That's great for me because I hate cardio. And my absolute favorite thing about them - you do the workout barefoot, my much preferred way. I've only done 3 workouts so far, with my 20-lb Kettlebell, and already I feel like I could bump up several pounds on a couple of the moves. Maybe one of these days I'll actually get buff. But I'd settle for simply not jiggly...

If you're curious about what Kettlebell moves look like, take a look at this video of the foundation move, two-arm swings.

Continue Reading "fighting against the food"

Thursday, February 07, 2008

Happy New Year!


2008 is the Year of the Rat. As a Dragon, apparently I am very compatible with Rats. I don't know any off the top of my head, though.

Continue Reading "Happy New Year!"

breakfast pasta?


This idea came from an episode of Mark Bittman's PBS show "How to Cook Everything", where he visited with Gabrielle Hamilton of the awesome NYC restaurant Prune. Gabrielle demonstrated her handkerchief pasta with poached egg, brown butter, ham, and bitter greens. Mark's simple version was spaghetti with a fried egg and ham. I did a bit of both. This is spaghetti with ham, arugula, and a fried egg.

The key to this dish is to slightly undercook the egg, the yolk must be quite runny. Then you simply take a fork and knife and chop everything up into a glorious mess. The yolk runs over the pasta making a delicious sauce, the ham that is hiding underneath the pasta gets tossed up like a surprise. The arugula, which I don't even cook, has just the right amount of peppery edge. This is a 10-minute meal, and it is simplicity at its best. I think this will become a staple. Recipe after the jump:

SPAGHETTI WITH HAM AND EGG
Serves 2
1/2 lb Spaghetti
2 slices French bistro-style ham, diced
2 eggs
4 ounces baby arugula
4 tablespoons butter
grated parmesan cheese, to taste
salt and pepper

Cook spaghetti according to package directions. Drain, then toss in a bowl with the raw arugula and half of the butter. The heat from the pasta will wilt the arugula. Salt and pepper to taste.

In a frying pan, saute the ham until browned, then divide among the serving bowls. Top with the spaghetti. Fry the eggs in half of the butter, sunnyside up, leaving the yolk undercooked, then slide the eggs onto the servings of pasta. Top with grated parmesan and serve.

Continue Reading "breakfast pasta?"

Monday, February 04, 2008

superbowl sunday supper: little limes


I never tried Key Lime Pie before the first time I went to Florida a few years ago. Every time I'd ever seen a Key Lime Pie (usually in a questionable diner), it was this bright unnatural shade of green, and it was really not very appetizing. But when I was actually in Florida, land of the Key Lime Pie, I saw pies that looked the way they were supposed to - yellow. And that looked pretty appetizing. I was pleasantly surprised by how sweet and fresh it was, and I finally saw the light.


I still don't see it much up here, and I doubt I'd really eat it if I did see it, because it's one of those things that really seems regional to me. It just probably isn't that good up here. But when I saw a bag of key limes on sale, I just had to try making one for myself. First, I was surprised at how tiny the limes are. I knew they were smaller than regular limes, but I didn't realize how much smaller. Here's a comparison next to a very average-sized lemon:


This, of course, meant that I had to squeeze many many limes to get enough juice for the pie. I also had to make a graham cracker crust. I almost always prefer a traditional pie crust over a crumb crust, but I was trying to be a purist here. Conclusion: crumb crusts are kind of a pain in the ass. There were crumbs everywhere and it wasn't the easiest thing getting the sides of the pie plate covered evenly. There is something to be said for the pre-made crumb crust.


The filling was surprisingly simple, aside from the carpal tunnel associated with squeezing over a dozen tiny limes. I had had no idea that it was all about sweetened condensed milk and not much else. That was it! Also, sweetened condensed milk is really freaking sweet.


Lastly came the meringue, and I have actually never made a pie topped with meringue. I think this is because I only got an electric mixer a couple of years ago, and before that I was way too lazy to whip egg whites by hand. I felt a little unsure about how well it would work without cream of tartar, which I have never used and thus did not have in the house. I don't even know what it's really for, so it hit me at one point that perhaps it is meant to keep the meringue softer, and without it I might end up with the crunchy kind of meringue, like a cookie. I really know nothing about meringue. Anyway, apparently it wasn't such a big deal because the meringue came out just right.


In the end, the flavor was more tart than I might have liked, probably due to the underripeness of the limes themselves. It was plenty sweet, though. I think overall I could do with less sugar, especially in the crust and the meringue. Structurally all the elements seemed to hold up decently well, although there was a liquidy element when I first sliced it and I'm not sure what caused it. Perhaps it came from the limes, perhaps from the meringue, I'll probably never know. But it was a fun experiment and made me feel a bit more adventurous about trying stranger pies. Maybe a chiffon next time? I don't even know what that is...

CLASSIC KEY LIME PIE

Ingredients
For the crust:
11 graham crackers
5 tbsp butter, melted and cooled
3 tbsp sugar (adjustable depending on the sweetness of the crackers)

For the custard:
1 14-oz can sweetened condensed milk
4 egg yolks (reserve whites for meringue)
2 tsp grated lime zest
1/2 cup key lime juice

For the meringue:
4 egg whites
4 tbsp sugar, preferably superfine

Preparation
Preheat oven to 350 degrees. In a food processor, process graham crackers with sugar to a fine crumb. Add the melted butter and mix to moisten crumbs. Press the crumb mixture into a pie plate as evenly as possible, using the back of a measuring cup to pack the crumbs and smooth the surface. Bake in the preheated oven for 10 minutes. Remove and set aside to cool. Reduce oven to 325

In a large bowl, whisk together the egg yolks and sweetened condensed milk. Add the lime zest, then slowly drizzle in the lime juice while continuously whisking to avoid any coagulation. Pour into the cooled pie shell and place in lowered oven for no more than 5 minutes.

In the meantime, whip the egg whites with an electric mixer, slowly adding sugar tablespoon by tablespoon, until it reaches stiff peaks. Spread the meringue evenly over the custard, being sure that the meringue touches the edges of the pie crust to avoid shrinking towards the center. Bake for 20 minutes until meringue is browned and soft set. Cool to room temperature, then refrigerate until ready to serve. This pie is best served cold.

Continue Reading "superbowl sunday supper: little limes"