Friday, December 28, 2007

pie & presents & personal injury

I was a walking accident the whole long Christmas weekend, and of course many of my little accidents happened in the kitchen. Some of them were more painful than others. Not only did I get a big old second-degree burn on my arm from the oven, I managed to accidentally pop the burn blister the next day when changing a pillowcase. This ensured that the burn would be the most painful burn I've ever had. Less than an hour after that lovely incident, I stepped on the claw of a hammer and took a chunk out of my big toe. Specifically, right on the joint of the big toe, so that every time I bent my toe, it would hurt. Don't ask me why there was a hammer on the floor. The next day I cut my finger while trimming fat off the brisket. I actually hardly ever cut myself cooking so I was kind of pissed. What the hell was wrong with me? Then, the ultimate in stupid accidents. This one didn't involve personal injury, unless you consider feeling stupid a personal injury. I spent all this time laying out the lovely lattice crust on my Sour Cream-Walnut Apple Pie for Christmas dinner, when I realized that I had forgotten to add the walnut layer to the pie. The layer that goes underneath the crust. I had to remove the entire freaking crust, add the walnuts, and place the crust a second time, only now the lattice strips were all slimy from the sour cream filling. Great.


Anyway, it wasn't all lame, because of course there were presents. J-Cat overdid it, as usual, and presented me with a parade of gifts throughout the evening, which culminated in my new shiny friend:


That's the Breville Juice Fountain Elite and it rocks. It's super powerful, great looking, and it's not such a pain to clean. Actually, it's very easy to clean being as that J-Cat is the one who has cleaned it every time. He's obsessed with it. The first night we searched around for something - anything - that we could juice, but all we had in the house was one very big carrot. Not surprisingly, we did juice that one carrot, and it yielded a pathetic amount of juice:


But now J-Cat is crazy for juicing, and has been making delicious juice every morning this week. By the time I'm out of bed and done working out, I've got a fresh glass of juice waiting for me. It's awesome. It's almost better than coffee. He's been using carrots, beets, kale, apples, watercress, parsley, ginger. I think I pretty much like anything with beets in it. This weekend I'm going to get a bunch of other fruits and veggies and do some more experimenting.

I didn't think presents could be better than that, but there is one more that I'm really excited about. He got us tickets to the Moscow Cats Theatre for tomorrow. Awesome.

Continue Reading "pie & presents & personal injury"

Wednesday, December 26, 2007

brisket and beer, revisited

What to do with the rest of a 5-lb brisket when the Steak & Guinness Pie only used 2 lbs?


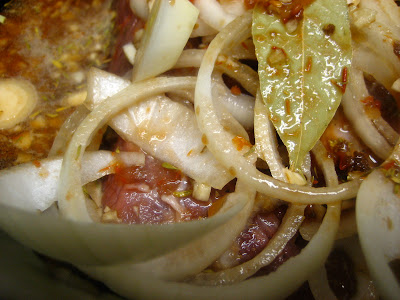
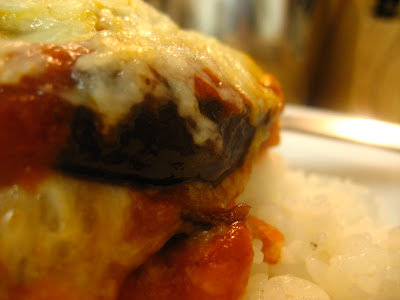
Braise it. And what better to braise it with than a bottle of the Guinness you bought for the pie? The great thing about this recipe is that despite the two main ingredients being exactly the same as the pie, it tastes completely different. The pile of onions sitting atop the brisket brings an incredible sweetness to the gravy. I browsed around at dozens of slow-cooked brisket recipes for some ideas, and noticed that a great many of them called for Heinz Chili Sauce. I didn't even know what the was, but luckily found it in the local grocery store. The verdict on that stuff is that it's pretty much ketchup with some vaguely pepper-like tinge, but the moniker Chili Sauce is a little misleading. Stuff is sweet.


Paired with the brisket was simply sauteed white cabbage with caraway seeds. Also rather sweet, but a nice light contrast to the beef and gravy.


The gravy, by the way, was the best thing ever. Recipes after the jump:


SLOW COOKER BEER-BRAISED BRISKET

Ingredients
3 lb flat-cut brisket
2 bay leaves
2 small onions, sliced into rings
1 bottle (12 ounces) dark beer
1/4 cup chili sauce (Heinz style)
3 tbsp brown sugar
3 cloves garlic, minced
1 tsp dried thyme
salt and pepper
2 tbsp cornstarch
1/4 cup water

Preparation
Rinse and pat dry brisket and trim off excess fat. Salt and pepper liberally. Place in a slow cooker set on High, 6-hour setting. Scatter onion rings and bay leaves over the beef. Mix together beer, chili sauce, sugar, garlic and thyme and pour over brisket. Cover and braise 6 hours or until it begins to fall apart with a fork. Remove brisket and set aside on cutting board to rest. Transfer the sauce to a saucepan. Skim off any excessive fat, but leave at least a couple of tablespoons worth in the pot. Mix the cornstarch and water, add to sauce and simmer on low until thickened, about 10 minutes. Slice brisket against the grain and serve topped with the gravy.


SAUTEED CABBAGE WITH CARAWAY SEEDS

Ingredients
1 small white cabbage, sliced into 1/4 inch strips
1 small onion, diced
2 tbsp butter
1 tsp caraway seeds
1/4 cup parsley, chopped
salt and pepper, to taste

Preparation
Melt butter over medium heat in a large, heavy saute pan. Add onions and saute until translucent. Add caraway seeds and allow to toast for 1 minute. Add cabbage and saute until soft.

Continue Reading "brisket and beer, revisited"

Monday, December 24, 2007

sunday supper: battle pastry, pt 2


If there was any part of me that felt like a cheat for using frozen puff pastry in the entree, I think I counteracted with dessert -- a Rustic Pear Tart. This free-form tart is pretty simple to make, yet if you have the patience to lay the pear slices out prettily can look super fancy and complicated. Mine fell somewhere in between I suppose.


The hidden gem in this tart is the layer of pulverized almonds hiding under the pears. It's certainly not a necessary element for a simple pear tart, but the subtly rich touch of almonds works beautifully against the sweetness of the pears. It's also the easiest part of the recipe, simply throw some almonds, flour, and sugar into a food processor, pulse until it becomes a fine sand, and set aside until you assemble your tart.


The real pain in the ass is, as always, the crust. It's just a simple all-butter shortcrust pastry, but I always have a bit of an issue with shortcrust pastry. It always seems like the classic half fat to flour ratio is too high, the resulting dough feels so soft that I worry it will simply melt when I bake it. I pretty much always end up adding much more flour than the recipe calls for, at least when I am rolling out the crust. After all, this stuff will stick to everything if you don't flour it liberally, and I even use a Roulpat!


In the end the crust came out fine - flaky, buttery, a little on the rich side, but that's to be expected if you choose to do all butter instead of half butter-half shortening. But I do think I have a ways to go in mastering shortcrust pastry, which is pretty lame considering that it is supposed to be the easiest pastry to make. As for the pears, the ones I had were less ripe than I would have liked, but I'm so into pears lately, they may overtake apples as my favorite dessert fruit. Recipe after the jump:

RUSTIC PEAR TART

Ingredients
Almond Filling:
1 tbsp almonds
1 tbsp flour
2 tsp sugar

Crust:
2 cups flour
1/4 cup sugar
3/4 cup unsalted butter, chilled and cut into small chunks
1/4 cup cold water

Pear Filling:
3 ripe Bosc pears, peeled, cored and sliced thin
1 tbsp lemon juice
1 tbsp sugar

Glaze:
1/4 cup apricot preserves
1/4 cup water

Preparation
Start by making the almond filling. Combine the almonds, flour, and sugar in a food processor and pulse until the mixture resembles coarse sand. Empty into a bowl and set aside. For the crust, combine the flour and sugar in the food processor and pulse a couple of times to mix. Add the cold butter pieces and pulse until the mixture resembles crumbs. Add water little by little and pulse to combine. You may not need all of the water depending on the moisture in the air, just add enough for the dough to begin to come together. Remove dough, shape into a disk, wrap in plastic wrap and chill in the refrigerator for at least an hour.

Preheat oven to 400 degrees. When the dough has chilled well, roll into a round crust, about 1/8 inch thick, on a well-floured board. You may need a fair amount of flour to prevent the dough from sticking to the pin and the board. Transfer the rolled out crust onto a baking sheet and return to the refrigerator while you prep the pears. Peel, core, and slice pears thinly. Toss the pears with the lemon juice and sugar and set aside. Remove the crust from the refrigerator and sprinkle the almond filling evenly over the center of the crust, leaving about a 2 inch border all around. Lay pear slices over the almond filling, overlapping in a pinwheel pattern.

In a small saucepan, combine apricot preserves with water and heat until warm and syrupy. (You could also do this in a microwave, heating on high for about 1 minute). With a pastry brush, brush the apricot syrup over the pears.

Bake tart in the preheated oven for 40-45 minutes, until crust is golden brown. Serve with whipped cream or creme fraiche.

Continue Reading "sunday supper: battle pastry, pt 2"

Sunday, December 23, 2007

sunday supper: battle pastry


Most people who know me at all know that I'm crazy about pastry. All kinds of pastry. Yet I haven't worked much with pastry beyond pie crusts or shortcrusts. I don't know why I haven't, considering how easy many pastries are. Because frozen puff pastry is the most amazing food item ever. Now that I've started working with it, I really think I may try wrapping everything in puff pastry. It would just make everything better, after all. For dinner tonight, I broke out a couple sheets of puff pastry to make a simple, hearty Steak & Guinness Pie.


Beef stew, wrapped in puff pastry? Bring it on. The ultimate in comfort food. Recipe after the jump:


STEAK AND GUINNESS PIE

Ingredients
2 lbs stew meat (round or brisket), cut in 1-inch cubes
2 tbsp olive oil
2 onions, sliced thin
3 cloves garlic
2 stalks celery, chopped
2 carrots, chopped
1 cup portabella or cremini mushrooms, sliced
1 sprig rosemary
2 tbsp butter
1 tbsp flour
2 tbsp Worchestershire sauce
1 can Guinness Stout
2 sheets frozen puff pastry, defrosted
1 egg, beaten
salt and pepper, to taste

Preparation
Preheat oven to 350 degrees. In a medium dutch oven or stock pot, heat olive oil. Saute onions and garlic until translucent, about 5 minutes. Add celery, carrots, mushrooms, rosemary and butter and saute until just starting to soften, about 5 minutes. Add beef, sprinkle with flour, and season with salt and pepper. Add Worchestershire sauce and Guinness. The liquid should just come to the top of the beef but not completely submerge it. Add water or beef stock if there is not enough liquid. Cover and simmer in preheated oven for 2 hours, stirring periodically. I recommend skimming the fat off about halfway through the simmer, depending on how fatty your beef is.

After 2 hours, remove the stew from the oven but do not turn off the heat. Set stew aside to cool slightly while you roll out the pastry. Roll out one sheet of puff pastry to about 1/8th inch thick and lay in the bottom of a 2 quart ovenproof deep casserole or bowl, allowing excess pastry to hang over the sides. Fill with stew, but avoid putting too much liquid in the pie. Roll out the other sheet of pastry a bit thicker than the first. Score lightly in a crisscross pattern. Brush the edges of the bottom crust with beaten egg. Lay top crust and press lightly around edges to seal. Bring excess bottom crust up over top crust. Brush top of crust with egg wash. Return to the 350 degree oven for 40-45 minutes until crust is golden brown.

Continue Reading "sunday supper: battle pastry"

Friday, December 21, 2007

what a tart


There is always a need for an effortless way to make an apple dessert. I didn't think there could be anything easier than my Apple Dumplings using premade pie crust, but this super-easy apple tart actually seemed easier.


I have actually never used frozen puff pastry dough before, if you can believe that. I had wanted some sheets of puff pastry to roll out for the crust of a steak and guinness pie (which I will finally be making this weekend, stay tuned), but when J-Cat ran out to the grocery store for me, all he could find were the puff pastry shells. At the time I just stuck them in the freezer, knowing they wouldn't work for the steak pie, but also knowing that eventually I'd think of a fun way to use them. I always figured that fun way would involve something sweet, and probably something fruity. So last night, after watching an episode of Good Eats focusing on pocket pies and desperately craving an apple pocket pie, I decided to break out those frozen pastry shells, slice up some apples, and improvise a tart. I was really happy with the results, though perhaps not as happy with the mess it left on the baking sheet. It was still completely worth it. Incredibly easy, and incredibly satisfying. Plus, I don't feel guilty about using pre-made puff pastry, since I don't think that many people really attempt puff pastry from scratch at home. It's not like I have a giant marble counter or anything. Recipe after the jump:


EASY APPLE TARTS

Ingredients
1 package frozen puff pastry shells (6 shells)
3 apples, peeled, cored and sliced thin
5 tbsp granulated sugar
1/2 tsp ground cinnamon
1/4 tsp ground ginger
1/4 tsp ground nutmeg
1 tbsp unsalted butter, cut into pea-sized pieces

Preparation
Set frozen pastry shells out to defrost at room temperature for 45 minutes to an hour, until pliable enough to roll. Preheat oven to 375 degrees. Using a lightly floured rolling pin, roll each shell out into a 5 inch disk and lay out on a baking sheet. Place the apple slices overlapping on the shells, leaving about a centimeter border around the edge of the pastry. Mix the sugar, cinnamon, ginger, and nutmeg in a small bowl. Sprinkle evenly over the apples. Dot the top of the apples with the butter pieces. Bake in the preheated oven for 25 to 30 minutes until the edges of the pastry have puffed slightly and are beginning to brown.

Continue Reading "what a tart"

Monday, December 17, 2007

chocolate cream pie


A classic and a favorite of mine -- chocolate cream pie. I'm actually not a big chocolate freak, but if you top it with a pile of whipped cream I'm much more interested. This pie seemed more cream than chocolate in the end, and I'm not complaining, but that probably goes against most other people's tastes.


I had to laugh at myself when I substituted some of the flour in the pie crust for whole wheat flour. Who was I kidding? Did this really make it any less bad for me? But strangely enough, in the end it was an interesting choice. The resulting crumbly texture put this crust somewhere between a classic pie crust and a cookie crust, either of which would go fine in a chocolate cream pie. I guess it was best of both worlds, with some extra fiber thrown in.


The only downside to this pie is that you have to do a lot of waiting. The pie crust dough needs to rest before rolling out and being baked, and the chocolate filling needs to cool and set for a while before adding the topping and serving. It's a little torturous.


But definitely all worth it in the end. Recipe after the jump:

CHOCOLATE CREAM PIE

Ingredients
Pie Crust
1 cup all purpose flour
1/3 cup whole wheat flour
1/4 tsp salt
1 tsp sugar
4 tbsp unsalted butter, chilled
4 tbsp shortening, chilled
3 tbsp ice water

Filling
3/4 cup white sugar
1/3 cup all-purpose flour
2 cups milk
2 ounces unsweetened baking chocolate, chopped
3 egg yolks
2 tablespoons butter, melted
1 teaspoon vanilla extract

Topping
1 cup chilled heavy cream
1 tbsp confectioner's sugar
1 tsp vanilla extract

Preparation
1. To make the crust, combine flour, sugar and salt in a large mixing bowl. Using a pastry cutter, quickly cut in the butter and shortening until the mixture resembles tiny split peas. Do not use hands to mix, as the heat from your hands will melt the butter and result in too dense a crust. Add the ice water and combine with a fork. Gather dough into a disk, wrap in plastic wrap, and allow to rest in the refrigerator for 30 minutes.
2. To make the filling, combine sugar, flour, milk, and chocolate in a 2 quart saucepan or a double boiler. Stirring constantly, cook over medium heat until mixture begins to bubble. Continue stirring for 2 minutes. Mix a small amount of the hot mixture into the egg yolks to temper, beating rapidly to avoid cooking the yolks. Stir the warm yolk mixture into the remainder of the chocolate mixture, and cook for an additional 90 seconds. Remove from heat, and stir in butter and vanilla. Set aside to cool while you roll out the pie crust.
3. Preheat oven to 425 degrees. Roll dough into a 12-inch circle. Line the pie plate, flute the edges and dock the bottom and sides with a fork. Lay a piece of parchment paper in the crust and fill with pie weights or dry beans. Bake in the preheated oven for 15-18 minutes until lightly browned, removing the weights for the last 5 minutes of baking. Allow to cool before filling.
4. Pour filling into pie shell and chill until set, about 2 hours. Shortly before serving, combine the topping ingredients and whip with an electric mixer to stiff peaks. Spread the whipped topping evenly over the chilled chocolate pie, and finish with shaved dark chocolate.

Continue Reading "chocolate cream pie"

Thursday, December 13, 2007

a little eggplant parm, a big cheat


I'm usually a purist. When I'm going to cook a classic -- one might say iconic -- dish, I want to know how it's always been done and I want to do it exactly that way. Well, this is one big exception. I started making this modified, easier, faux-healthier version of eggplant parmigiana ages ago, and I must admit that I have never gone back to making it the traditional way.


There's more than one reason for this. The first being that I love eggplant parm, but I'm rarely motivated enough to make a classic one from scratch when I can just get some fairly good takeout at half a dozen places within half a dozen blocks. The breading, the frying, the oil, the stacking, etc. A big mess, and a good bit of time. This version eliminates the step of frying the eggplant slices in favor of baking them in the oven. You could also tell yourself that this makes the dish much healthier, but I try not to think that way when I'm piling on tons and tons of cheese. Regardless of the question of health, I realized after making this a zillion times that I actually prefer it this way, because it is much less greasy.


Of course, in a perfect world, you'd have a vat of homemade, slow-cooked marinara in the freezer at all times. I do try to remember when I do make marinara that you should always make 10 times more than you need and freeze batches for quick recipes. But let's be honest, the freezer is packed full enough already, so your favorite jarred marinara will do fine as well. The same homemade vs. storebought question goes for the breadcrumbs, which are best made fresh, but on a weekday night, I'll break out the Italian style in the canister. And yes, I eat this over rice. Short grain, sticky, Asian rice. Keepin' it real.
Recipe after the jump:

NO-FRY EGGPLANT PARMIGIANA

Ingredients
2 medium eggplants (I think about 5 lbs total?)
3 cups (or 1 24 oz jar) marinara sauce
4 cups shredded part-skim mozzarella cheese
1/3 cup shredded parmesan
1/3 cup shredded romano cheese
1/2 cup Italian style bread crumbs
cooking spray

Preparation
Preheat oven to 400 degrees. Slice eggplant into 1/4 inch rounds and place in a single layer on a sheetpan sprayed lightly with cooking spray. Spray the surface of the slices with cooking spray. Bake in the preheated oven for 15 minutes.

Lower the oven to 375. In an 8x8 casserole dish, spread a layer of marinara sauce and sprinkle with an even coat of breadcrumbs, parmesan, and romano cheese. Lay the baked eggplant slices on the sauce layer. Top with another layer of sauce, breadcrumbs, parmesan, and romano. Top the layer with half of the shredded mozzarella. Repeat the layer of egglplant, sauce, breadcrumbs, parmesan, and romano, but do not put the final layer of mozzarella. Bake in the lowered oven for 30 minutes. Add the final layer of mozzarella and return to the oven for 15 minutes or until the cheese is melted and starting to brown. Serve with crusty bread, pasta, or over rice.

PS. This dish is even better the second day.

Continue Reading "a little eggplant parm, a big cheat"

Monday, December 10, 2007

stuffed

I have not disappeared! It's just that time of year. Holidays, social obligations, awards screening season, hibernation. Sadly, I have not had much time for cooking. Or, more accurately, I have not had much time for thinking about cooking. And with me, thinking and planning is more than half the battle when it comes to cooking. Ironically, now is the time that J-Cat has been getting increasingly interested in cooking. This weekend, he made me breakfast both mornings, and seemed to actually really have fun doing it. Yesterday he asked me what I was craving, and I answered hash browns, even though I did not really think he would attempt it. I love classic grated hash browns, but I can never seem to get it unless I go somewhere in the south with a Waffle House. What's with the preference for home fries around here? Home fries are whack. Anyway, J-Cat was determined to give me my home fries, so he googled around for some recipes, decided that he would pick and choose parts of various recipes, then essentially just wing it. Awww, just like me. And he said it was really fun! I guess he's finally starting to understand why I love it like I do.

The result was more like a giant latke than classic hash browns, but I love latkes so I still thought it was tasty.

Anyway, no Sunday Supper last night, as I was enjoying a lovely crafting afternoon at Leah's. I did manage to finish another stripe and a half on my ripple afghan, but it still doesn't look like I'm making any progress whatsoever. So since I do not have a great experiment to share, here's one of my quick and easy made up dishes from last week -- Stuffed Peppers.


Growing up in my household, I don't think I ever really tasted the classic versions of many foods. Both of my parents were totally incapable of making a dish without completely tweaking it to suit their tastes. This was not a bad thing, as my mom's meatloaf and my dad's burgers were awesome. I just never knew what real meatloaf tasted like. So Stuffed Peppers is kind of my homage to that. I don't even know what Stuffed Peppers are usually like. I don't think I've ever eaten them. I don't know what people usually stuff in them. I just kinda made this up.


The peppers were giant, so one per person was plenty. I stuffed them with a mixture of ground beef, onions, garlic, tomatoes, spices, cheese, and bulgur wheat. Recipe after the jump:

STUFFED PEPPERS

Ingredients
4 large green bell peppers
1 lb lean ground beef
1 cup bulgur wheat
1 tbsp olive oil
1 small onion, diced
2 cloves garlic, minced
1 15 oz can diced tomatoes
2 tbsp tomato paste
1 cup shredded cheddar cheese, plus more for sprinkling
1 tbsp worchestershire sauce
1 tbsp dried oregano
1 tsp ground cumin
1/2 cup chopped parsley
salt and pepper

Preparation
Preheat oven to 350 degrees. In a large bowl, combine the bulgur wheat with 1 1/2 cups boiling water. Cover with plastic wrap and set aside to steam for 15-20 minutes. While the bulgur is steaming, heat olive oil in a large skillet over medium heat. Add onions and garlic and saute until translucent. Add ground beef, breaking up with the spoon, and saute just until it begins to brown. On a hot spot on the skillet, add the tomato paste and let carmelize for a minute before mixing in. Add the tomatoes, reserving about a quarter cup, and stir to combine. Drain off any excess fat, if desired. When the bulgur is tender, drain with a fine sieve and return to bowl. Add the browned beef, seasonings, and cheese and toss to combine well. Set aside while you prep the peppers. Slice off the top of the pepper and remove all seeds and ribs. Fill with the beef mixture and place in a baking dish just large enough to hold the four peppers (this will help prevent the peppers from falling over when they soften). Spoon tomatoes over the top to prevent drying. Bake in the preheated oven for 45 minutes, then sprinkle cheese over top and return to oven for 10-15 minutes or until cheese is melted and beginning to brown.

Continue Reading "stuffed"

Monday, December 03, 2007

sunday supper: apple crisp


It's bad timing that just as the holiday season kicks off and our sunny presence is requested at a zillion social functions, I start moving into my hibernation mode. It's cold, it's snowy, it's dark too early, and I just want to sleep. I'm trying to strike the balance between the enforced socializing and the hiding away, but even then I feel busy and haven't had much time to cook. Last night, strangely enough, J-Cat even made dinner and I just handled dessert. Actually, to be more accurate, J-Cat made breakfast, he just made it at 7PM. He has become the king of omelets, he's really quite good at them, and made a delicious omelet with goat cheese and sauteed spinach and onions. Delicious. I went for something pretty simple with an Apple Cranberry Crisp.


Crisps are a perfect stand-in for pie when you're just too lazy to make pie crust. I kept this one really simple, with just oats, flour, brown sugar and butter making the topping. The oat-y flavor was perfect comfort food on our first snowy day of the season, and the smell made the whole house cozy. Recipe after the jump:

APPLE CRANBERRY CRISP

Ingredients
4-5 medium baking apples, peeled and sliced thin (I used Cortland)
1 1/2 cups fresh cranberries
3/4 cup sugar
1 tbsp lemon juice
1/4 tsp salt

FOR THE TOPPING:
1 cup rolled oats
1/2 cup packed brown sugar
1/2 cup all-purpose flour
4 tbsp room temperature unsalted butter
1/2 tsp ground cinnamon

Preparation
Preheat oven to 325 degrees. In a large bowl, combine apples, cranberries, sugar, lemon juice, and salt. Toss to combine well and set aside while you assemble the topping. In another bowl, combine oats, sugar and flour and toss to combine. Using a pastry cutter or a fork, break up the butter into the oat mixture evenly. In a 1.5 quart greased baking dish, pour the apple mixture and spread evenly. Sprinkle the topping evenly over the fruit. Lightly dust the top with cinnamon. Bake in the preheated oven for 50-60 minutes until the top is browned and crisp and the juices are bubbling. Serve with ice cream or whipped cream.

Continue Reading "sunday supper: apple crisp"

Tuesday, November 27, 2007

turkey jerky

I'm officially the worst food blogger ever. Despite making the turkey, a pie, and a loaf of bread for Thanksgiving, I have no pictures. Because I am lame. In my defense, the bread and pie weren't done until the wee hours, and I was pretty tired. I brined the turkey at my house and transported it to my brothers to be cooked. I didn't want to take pictures of the finished turkey with everyone around, that's a little goofy. Actually I admit I took a couple of pictures of the turkey floating in the brine, but they kind of turned out...obscene. You don't wanna know. But all turned out well.

The bread was the infamous No-Knead Bread recipe, which I've blogged about before. The strange thing about this bread was that it yet again didn't rise very well, which happened when I first tried it last Thanksgiving. Yet I've made the same bread 2 or 3 times since then and they've come out perfectly. I guess Thanksgiving bread is just cursed.

The pie was the Autumn Harvest Pie, which I just made a few weeks ago. I'm a big believer in going with a proven successful recipe when cooking for a large group of people. Days like Thanksgiving just aren't days for experimenting.

The turkey recipe was from Alton Brown. I had made this recipe a couple of Thanksgivings ago, and was so happy with it that I have a feeling it will become the go-to turkey recipe. The only thing I don't really like about it is having the clean the brine bucket afterwards. It's too big for the sink, I actually have to clean it in the bathtub...

Continue Reading "turkey jerky"

Thursday, November 15, 2007

mascarpone mess


I thought it would be so simple. Sweeten some mascarpone cheese, maybe throw in some vanilla, then throw whatever you want on top and voila! Beautiful, easy dessert. After all, the mascarpone and espresso granita dessert that we had at Del Posto last week seemed that simple, though I didn't want to bother actually making granita. I decided to just cook down some raspberries with water and sugar to top the mascarpone with a sweet berry syrup. And actually, it really wasn't terrible, but the mascarpone was deadly rich, and the raspberry syrup was not tangy enough to cut the richness, as I had supposed it would be. In the end - and after some random amount of milk and a lot of electric whisking - the fluffed up, lightened up mascarpone cream was incredibly delicious. So the bottom line is that I'm not as hardcore with the rich desserts as I thought I was, and a little air goes a long way. Also, cats really do like anything and everything dairy.

Continue Reading "mascarpone mess"

Tuesday, November 13, 2007

monday supper: date with a duck

Sunday supper ended up on Monday this week, since we were out eating noodles with the family on Sunday. I don't know why I thought this dish would be doable on a Monday evening after work. It's a good thing J-Cat got home pretty late last night because it took longer than any weeknight dinner should ever take and I would have felt bad if he had to sit around waiting for a couple of hours. I do think it was more than worth the wait, though, as it was a dish that I literally dream about: Duck Ragu with Fresh Pappardelle.


What ended up taking more time than expected was the preparation of the duck legs. The simple line in Mario Batali's recipe that says "4 duck legs and thighs, skinned" seems so innocuous, until you realize how freakin fatty duck legs are. I think at least half of the weight of those duck legs was thick hard fat that had to be trimmed away along with the skin. But once that was done and the legs seared off, it was smooth sailing.


This was not an inexpensive dish. In addition to the duck, which is a pretty pricey meat, the recipe called for 2 ounces of dried porcini mushrooms. He has another version of the recipe that leaves out the mushrooms, but I think they add incredible flavor.


The interesting thing about this dish is that the aroma was rather gamey and made me worry that the duck would be overpowering, but the flavor was much more subtle than the apartment smelled as it cooked. All in all, I was more than happy with the results. This is one of those dishes that I always seem to crave on a gray, rainy day, and I'm thrilled that my homemade version can totally satisfy. Perhaps I cheated a bit by getting ready-made fresh pappardelle at the Italian market, but perhaps next time, for a real Sunday Supper, I'll do it up right. Find the recipe here.

Continue Reading "monday supper: date with a duck"

Friday, November 09, 2007

Best. Perk. Ever.

Dinner at Del Posto...for free. (Not that I didn't pay for it in another way.) It was a promotional special highlighting the Maremma region of Tuscany, and featuring a guest chef from a highly acclaimed hotel in Maremma call Il Pellicano. I would really love to say something interesting and insightful about the experience - because it was a really great one - but the dinner featured regional wine pairings with each course. Five gigantic glasses of wine. By the time we were done with the second dessert, I really wanted to put my head on the table but Del Posto is a little fancy for that. It wasn't a pretty picture. While waiting for J-Cat to get a cab, I really really needed to sit down so I went ahead and sat down. On the sidewalk. I had the consideration to walk around the corner so I wouldn't be sitting there like a bum right in front of the restaurant, but how was I to know that I was sitting there like a bum right next to the kitchen door that Mario Batali goes in?

Anyway, needless to say, I'm really inarticulate today, so I'm just going to give a quick rundown of what we got to eat, because I want to be sure to remember it for posterity.

The meal was a five course tasting menu, but really it was six courses because the amuse bouche was huge:

Amuse bouche: Polenta with shaved white truffles
Antipasti: Bacala Cake with two types of mussels and potato puree
Pasta: Veal tortelli with cream sauce
Entree: Braised veal cheeks over polenta
Dessert 1: Mascarpone with espresso granita
Dessert 2: Semifreddo with strawberry soup, rosemary, balsamic syrup and madeleines

It was all really fantastic, though the pasta was not surprisingly the standout dish. I wish I remembered the more detailed descriptions of the dishes from the menu but I don't. I also wish I remembered the wines we drank, but there were too many to remember. They were all from Maremma, that's all I really know. The first was a delicious white, slightly sweet, very floral and with a hint of pear. The next four were reds. In giant glasses. I was lost already by then...

Continue Reading "Best. Perk. Ever."

Tuesday, November 06, 2007

sunday supper: apple dumplings


If you've ever been too lazy to make a homemade dessert, yet the craving for hot fresh pie is haunting you, this is quite literally the easiest apple pie imaginable. Once upon a time, I discovered that those Pillsbury Just Unroll Pie Crusts are actually really really good, and I've managed to refrain from reading the ingredients, which I have no doubt would ruin the whole thing for me. But sometimes on a lazy cold Sunday, you don't want to make pie crust, even though Sundays don't seem complete without pie. Enter the apple dumpling. Some apples, some butter, some sugar, some spices, and a box of pre-made pie crust. Combine it all into cute, single serving packages, and proceed to eat three of them, hot out of the oven. As much as my more elaborate pies are loved, this dessert may just take the prize.


Recipe after the jump:

BAKED APPLE DUMPLINGS

Ingredients
4 medium baking apples, peeled, cored and cut in half (or use 8 small apples and keep them whole)
3 tbsp unsalted butter, softened
1/2 cup packed dark brown sugar
1/2 tsp ground cinnamon
1/4 tsp ground nutmeg
1/2 tsp ground clove
1 box unrollable pie crusts (2 crusts per box)
1 egg, beaten

Preparation
Preheat oven to 425 degrees. In a small bowl, combine butter, sugar and spices to make a thick paste. Roll out the first crust, evening out with a rolling pin and stretching slightly into a rectangular shape. Slice the pie crust into 4 quadrants. Take one apple half and spread about a teaspoonful of the butter mixture into the hole left by the core. Place the apple half flat side down in the middle of a crust quadrant. Brush the edges of the crust with beaten egg and bring up the sides to a point, sealing all edges well. Repeat with the remaining apple halves and the second crust. Place dumplings in a baking pan with at least 1 inch deep sides (I used 2 pie plates for 8 dumplings). Brush the top of the dumplings with the egg, then sprinkle a pinch of cinnamon and sugar on top. Bake at 425 for 10 minutes, then lower the heat to 375 for another 20-25 minutes or until golden brown. Remove and let cool before serving.

Continue Reading "sunday supper: apple dumplings"

Monday, November 05, 2007

sunday supper: pub style


I think the primary lesson learned last night is that when you are making something that is by definition rustic, you shouldn't try to get all fancypants. Last night I made a fake version of one of my all time favorite pub foods -- Bangers & Mash with Onion Gravy. I say fake because I had neither the right type of sausage for true Bangers & Mash, nor an actual recipe for the gravy. Also, somewhere in my strange head, I wanted something that is probably incapable of looking pretty to look a little pretty. The result was somewhat cool-looking, but a total pain in the ass to serve up.


Two types of sausage, coiled into a giant sausage frisbee. Why? I have no idea. I skewered the coil to keep things contained, then realized that it really wasn't about to go anywhere so all that accomplished was making it annoying to take the skewers out and cut the sausage up evenly.


The gravy turned out to be the easy part, despite my longstanding assumption that good gravy was a tricky thing. I don't think my gravy was remotely authentic, but it tasted damn good, so I don't care. As for the mashed potatoes, that is my classic non-recipe dish; just keep adding stuff until it tastes good.


In the end, the attempt at prettiness was utterly dumb since I had to slice up the sausage to serve anyway. The finished product was not pretty, but it was pretty damn tasty.


Recipe after the jump:

BANGERS AND MASH

Ingredients
2 pounds pork sausage
1 tbsp olive oil
2 onions sliced thick
1 tsp flour
1/2 cup balsamic vinegar, to taste
1 cup chicken stock
fresh herbs
2 bay leaves

Preheat oven to 450 degrees. Drizzle olive oil in a preheated roasting pan or casserole. Add onions and stir to saute until they just begin to turn translucent. Lay sausages on top of the onions, sprinkle with herbs, and lay the bay leaves on top. Roast for 40 minutes or until sausages are well browned.

Remove from oven and set sausages aside. Place pan with onions on a burner over high heat. Sprinkle flour over onions and stir well to eliminate lumps. Pour balsamic vinegar and stock and simmer until thickened. Serve sausages and gravy over mashed potatoes.

Continue Reading "sunday supper: pub style"

Wednesday, October 31, 2007

must have

My great love - donuts - made fresh at home?

Continue Reading "must have"

fresh halloween


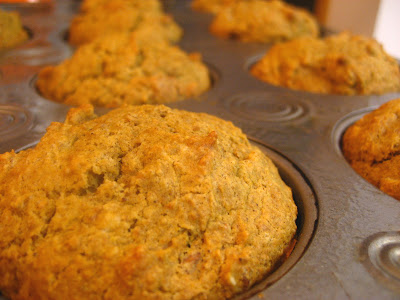
Pumpkin muffins! These are the easiest muffins ever; I threw them together the other night while I was waiting for water to boil for our pasta. We had pumpkin ravioli in a brown butter sage sauce. They were really good, but really rich, and the last thing we wanted for dessert after that was more pumpkin, but luckily these work well as a breakfast food. I threw in some chopped pecans, since everything is better with nuts, and spiced them with all the classic aromas of the season -- cinnamon, clove, nutmeg, allspice, ginger. I never make muffins very sweet, so if you prefer a sweet muffin, definitely add a bit more sugar than my recipe calls for. These would also be awesome with a cream cheese frosting as for a carrot cake.


Recipe after the jump:

SPICED PUMPKIN PECAN MUFFINS

Ingredients
1 to 1/2 cups all-purpose flour
1/2 cup whole wheat flour
1/2 tsp salt
2 tsp baking soda
1/2 tsp cinnamon
1/2 tsp nutmeg
1/2 tsp ground ginger
1/2 tsp allspice
1/2 tsp clove
1 egg, beaten
1/2 cup sugar (use 3/4 cup for a sweeter muffin)
1/4 cup melted butter, cooled
1/2 cup milk
1 cup pumpkin puree (pure pumpkin, not pumpkin pie filling)
1/2 cup chopped pecans

Preparation
Preheat oven to 350 degrees. Sift together 1 cup of the white flour and all remaining dry ingredients in a large mixing bowl. In another bowl, whisk together wet ingredients. Slowly add wet ingredients to dry ingredients, stirring just until the flour is incorporated. Do not overstir, the batter will be lumpy. If the batter is too runny, add the remaining 1/2 cup white flour. Fold in the chopped pecans.

Fill paper-lined or greased muffin tins about 2/3 full. Bake for 20-25 minutes until top is lightly browned and a toothpick inserted in the center comes out clean. Makes about 12 muffins.

Continue Reading "fresh halloween"

Monday, October 29, 2007

sunday supper: battle wine, pt. 2

It is a strange day when I opt against making the apple dumplings that I had planned for last night. For some reason, I was craving something a little lighter and the idea of poached pears kept popping up in my head. As luck would have it, I had the leftover wine, plus 3 bosc pears sitting in the fruit drawer. I've never poached pears before, but having eaten my fair share I figured it couldn't be that complicated. I mean, just take some pears,


and drop them in some wine! In the spirit of the cooler weather, I spiced the wine with aromatics, including a cinnamon stick, a couple of allspice berries, and a couple cloves. It made the whole house smell very festive and got both J-Cat and Opaw-Cat sniffing and searching for the source. I combined about equal amounts of water and wine, and added about 1/3 cup of sugar.


After poaching for about 15 minutes, I removed the pears with a slotted spoon and set them aside to cool slightly, then cranked up the heat on the wine to reduce it down to a thin syrup.


By the time we were done eating our main course, the syrup had thickened nicely. I spike it with a pat of butter, then poured the glistening wine reduction over the pears for a sweet and intensely flavored kick. This was awesome, and afterwards I was bummed that we only had three pears to share between us.


Recipe after the jump:

RED WINE POACHED PEARS

Ingredients
3 bosc pears or other relatively firm pears
1 1/2 cups red wine
1 1/2 cups water
1/3 cup sugar
1/2 vanilla bean
1 cinnamon stick
3 allspice berries
3 cloves
1 pat unsalted butter

Preparation
In a saucepan, combine the wine, water, sugar, vanilla bean, and spices and bring to a light boil. Peel, core, and halve the pears lengthwise. You can also keep the pears whole if you have an apple corer. In this case, slight the bottom of the pear so that it will stand upright for nice presentation. Drop the pears into the simmering wine and poach for 15 minutes, or until a knife is easily inserted. Remove the pears from the poaching liquid with a slotted spoon and set aside to cool. Turn the heat on the wine to high and reduce down until to a thin syrup. Add a pat of butter to the syrup, stir well, then drizzle over the pears.

Continue Reading "sunday supper: battle wine, pt. 2"

sunday supper: battle wine


J-Cat and I are total lightweights. Neither of us have any tolerance for alcohol, and it's totally pathetic. So last night when I got a bottle of red wine for dinner, I realized that if anything we'd each have maybe two small glasses and be left with half a bottle of wine. Of course, I could have stashed away the leftovers for the next night, but if you saw how packed my fridge currently is, you'd realize that this is not an option. So the logical conclusion is of course to cook with the rest of the wine, hence "Battle Wine".

Part one was a simple beef stew, to celebrate the fact that the weather has finally cooled down. My stew is so simple that it hardly calls for a recipe. Start with some olive oil in a big heavy stew pot, generously salt and pepper the beef, then sear beef on all sides. Toss in the roughly chopped mirepoix. (That's one of Josef's favorite words, and consists of carrots, celery, and onions.) Saute until the veggies have started to soften, then sprinkle the whole thing with a couple tablespoons of flour. You could also do it correctly and make a slurry with cold water and either flour or cornstarch, but I just sprinkled it in. Pour in a couple glasses of wine, then a big can of whole plum tomatoes. If you need more liquid, add either water or beef stock. Throw in whatever fresh herbs you have on hand -- I had a bunch of sage and parsley. Bring to a boil, then lower to a strong simmer for 1 to 1.5 hours, depending on how small you cut the meat and how soft you like it. I also add chopped potatoes, but hold them back for the last 45 minutes or so of cooking because I prefer them not so mushy. Serve with a piece of crusty bread, or over rice.


Coming up next, part two of Battle Wine, in which we experiment with some pears.

Continue Reading "sunday supper: battle wine"

Monday, October 22, 2007

sunday supper: pumpkin & squash


I insistently keep trying to enjoy autumn, even if the weather won't let me. In the high 70's now in late October, we're well on our way to breaking the record for hottest October ever. But I guess upstate it's cooled down enough to grow the pumpkins and squash that make this season so yummy. Our first course last night was hearty and delicious enough to be a whole meal - a Butternut Squash and Carmelized Onion Galette. I found this recipe on the fantastic food blog Smitten Kitchen while I was searching around the internet for any comments or attempts at the Pumpkin Bread Pudding recipe in this month's Gourmet magazine.


The only thing I did differently from her recipe was to substitute a bit of the flour for whole wheat flour, adding a bit of nutty flavor and some fiber to our lives. I ended up needing quite a bit more flour than the recipe called for, perhaps because I had to use reduced fat sour cream (it's what I had on hand) and it made things a bit wetter than regular sour cream would have. In any case, I simply kept adding flour until the dough was dry enough to handle easily. I suspect the end result was a slightly less crumbly and flaky dough, but it was still delicious.


What really made this recipe was the carmelized onions. The sweetness was a perfect pairing with the squash and the fontina cheese, and the touch of cayenne set it off wonderfully. This would be a fantastic Thanksgiving starter.


So for dessert, I focused on squash's cousin -- pumpkin. The recipe in Gourmet is a must try. Ten times easier than making a pumpkin pie, but every bit as satisfying. I used Challah bread and added chopped pecans. I think next time I might reduce the sugar a bit, and add a drizzle of maple syrup over top. Also an excellent Thanksgiving dessert.

Continue Reading "sunday supper: pumpkin & squash"